 Emily CarterScreen Recording
Windows 11 can record screen video with system audio, microphone audio, or both, depending on the tool and its audio settings. To screen record with audio on Windows 11, choose a method based on the audio source and recording area: Xbox Game Bar suits supported apps and games, Clipchamp suits browser tabs, and modern Snipping Tool versions can record a selected region with live audio. For flexible desktop capture, Fionn Screen Recorder is another option. This guide covers four methods; make a short saved test recording before capturing anything important.
Choose the Right Windows 11 Recording Method
| Method | Recording Area | Audio Sources | Best For |
|---|---|---|---|
| Xbox Game Bar | Supported app or game | Computer audio and optional microphone | Gameplay and app demos |
| Clipchamp | Browser tab | Shared tab audio and microphone | Web demos and tutorials |
| Snipping Tool | Selected screen region | System audio and microphone in supported versions | Quick screen clips |
| Fionn Screen Recorder | Full screen, window, or region | Configurable system and microphone audio | Flexible desktop recording |
System audio and microphone audio are separate sources. Select each source deliberately, then play a short saved clip to confirm the result. Availability and controls can vary by app version; protected content may not be recordable.
Method 1: Record an App or Game With Xbox Game Bar
When to use: You need to capture a supported game or app with computer sound, optional narration, or both. Xbox Game Bar is designed for game and app capture rather than every desktop-recording scenario.
- Open the supported app or game you want to capture.
- Press
Windows key + Gto open Xbox Game Bar.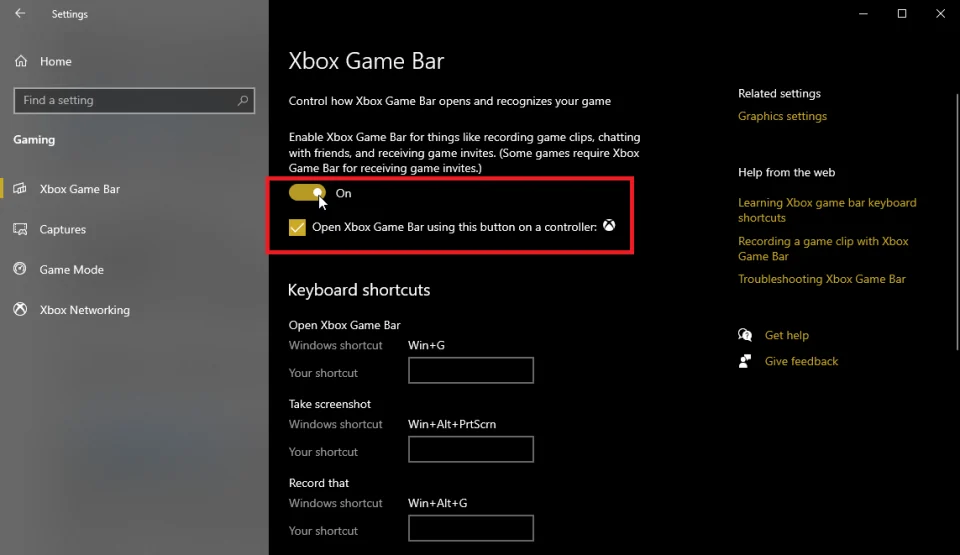
- Open Game Bar settings and select
Capturing
.
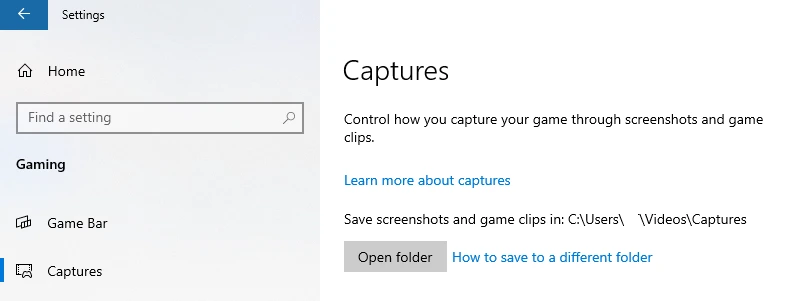
- Set audio capture to All to include computer sounds.
- Use
Windows key + Alt + Mto toggle microphone capture as needed. - Press
Windows key + Alt + Rto start recording, then press it again to stop.
Verify: Play the saved clip and check computer audio and microphone narration separately. If one is missing, review its separate capture setting before making a longer recording.
Method 2: Record a Browser Tab With Audio in Clipchamp
When to use: You are creating a web demo, tutorial, or presentation and need the selected tab’s shared sound plus optional narration. In the Clipchamp Windows app, Edge tabs are supported for tab selection. To record a Chrome tab, open Clipchamp in Chrome. Interface choices and audio-sharing availability can differ by account and app version.
- Open Clipchamp.
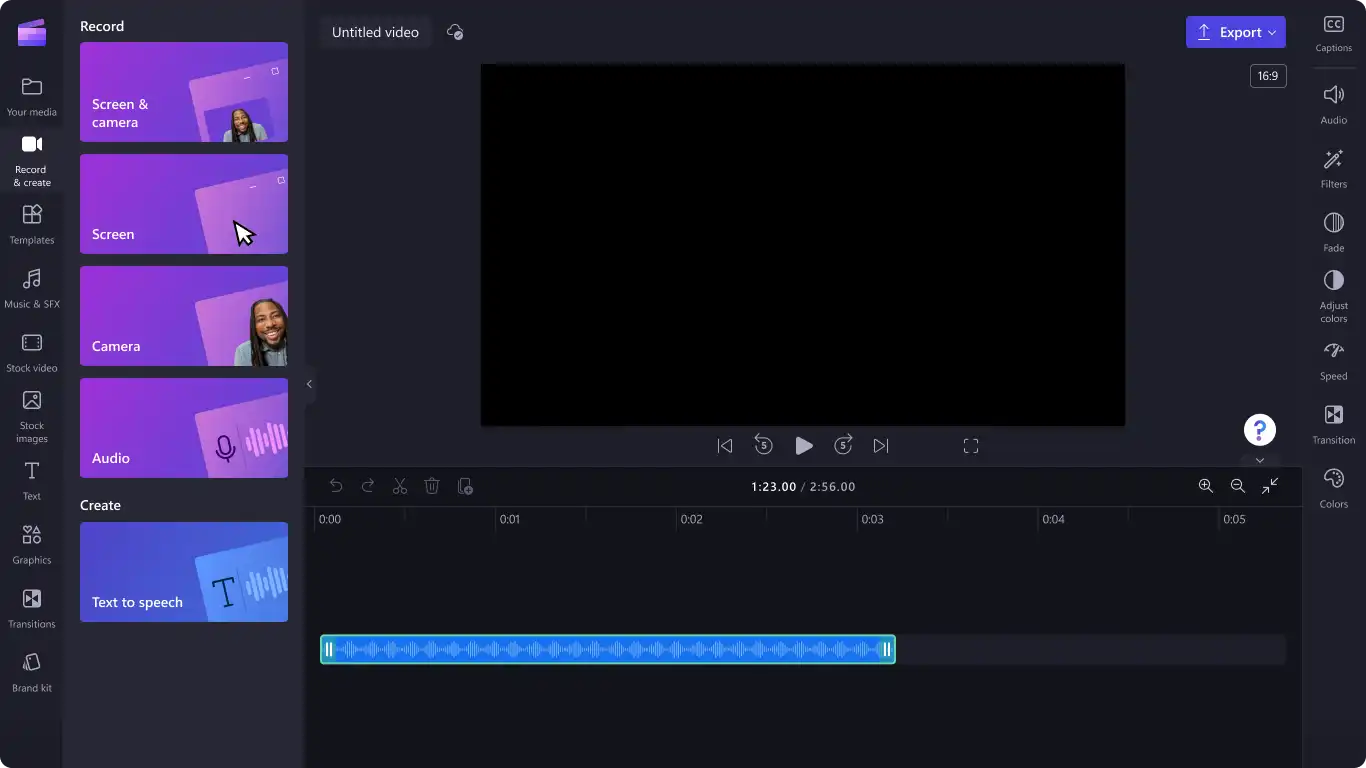
- Choose the screen-recording option.
- Select a microphone if you need narration.
- Choose the browser tab in the sharing dialog.
- Enable tab audio sharing.
- Record the tab, then stop when finished.
- Preview the clip and export it after confirming the audio.
Verify: Confirm that the preview contains the intended tab audio and narration. Microsoft’s screen-recording instructions for Clipchamp explain browser-tab sharing.
Method 3: Record Screen and Audio With Snipping Tool
When to use: You want a quick recording of a selected screen area with live sound. Modern Windows 11 Snipping Tool versions support screen video, system audio, and microphone audio; the available controls can differ between versions. Clipchamp can remain useful for optional editing after recording.
- Open Snipping Tool.
- Select
Record
.
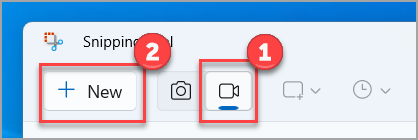
- Select the screen area to capture.
- Check the available system audio and microphone controls.
- Start recording.
- Stop the recording and save the clip.
- Play the saved video to verify its audio.
Verify: Listen for the source or sources you enabled. If the clip has video but no sound, check the audio controls available in your Snipping Tool version and make another short test clip.
Method 4: Record Screen With Audio Using Fionn Screen Recorder
When to use: You need to select a full screen, window, or region and configure the sound source before recording. This is a practical option for tutorials, demonstrations, and recordings that need explicit desktop-area and audio choices.
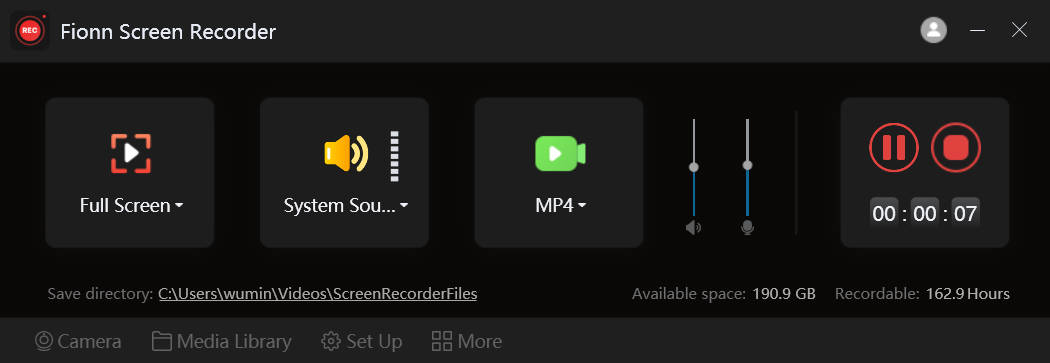
- Open Fionn Screen Recorder and choose the area you want to capture: Full Screen, Window, or Region.
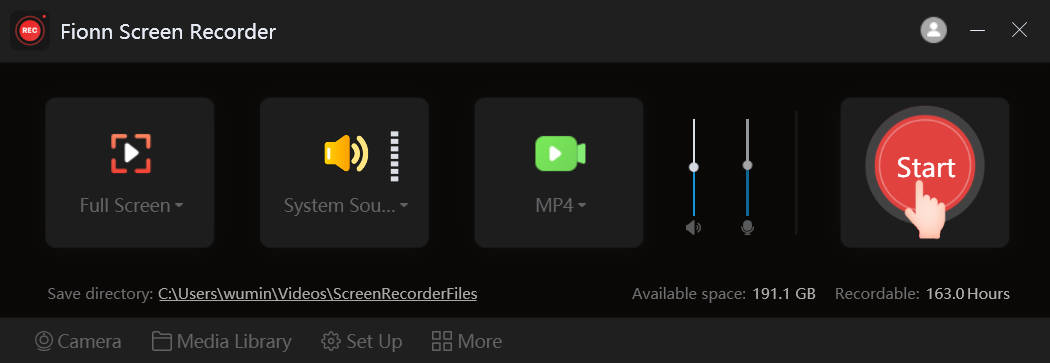
- Select Full Screen, Window, or Region from the recording area menu based on what you need to record.
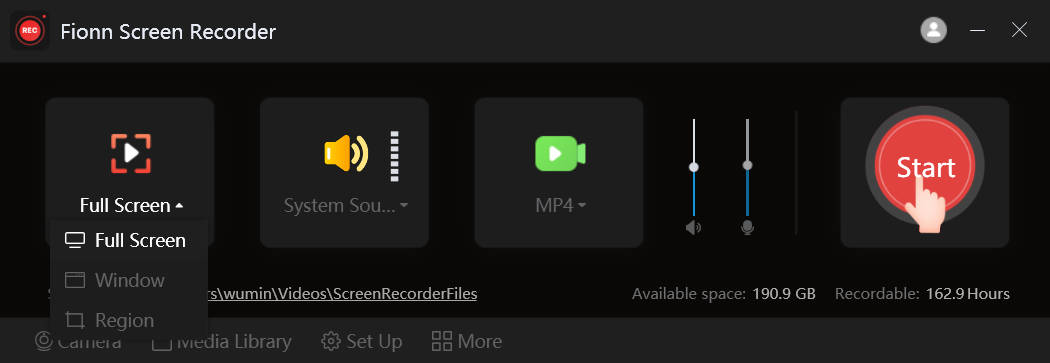
- Choose whether to record system audio, microphone audio, both, or no sound.
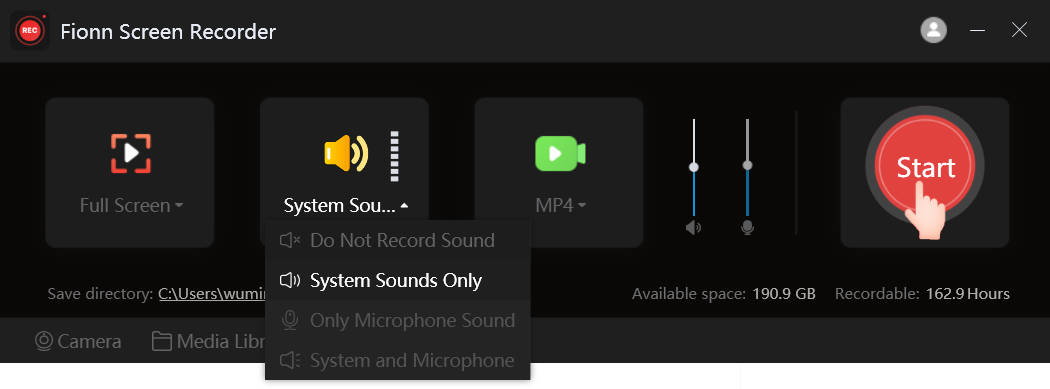
- Select MP4 or another video format before you start recording.
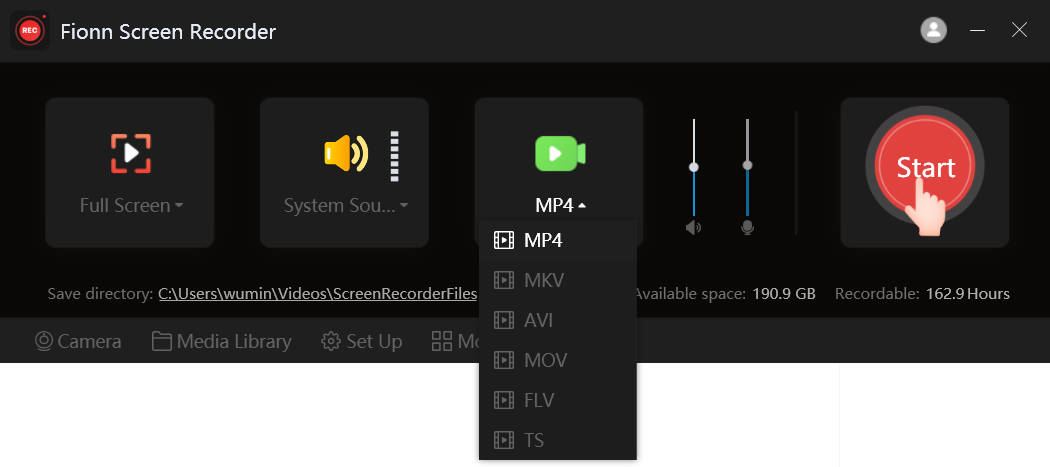
- Click Start to begin recording, then use Pause or Stop when you are finished.
- Open Media Library to play, edit, locate, or delete your recorded videos.
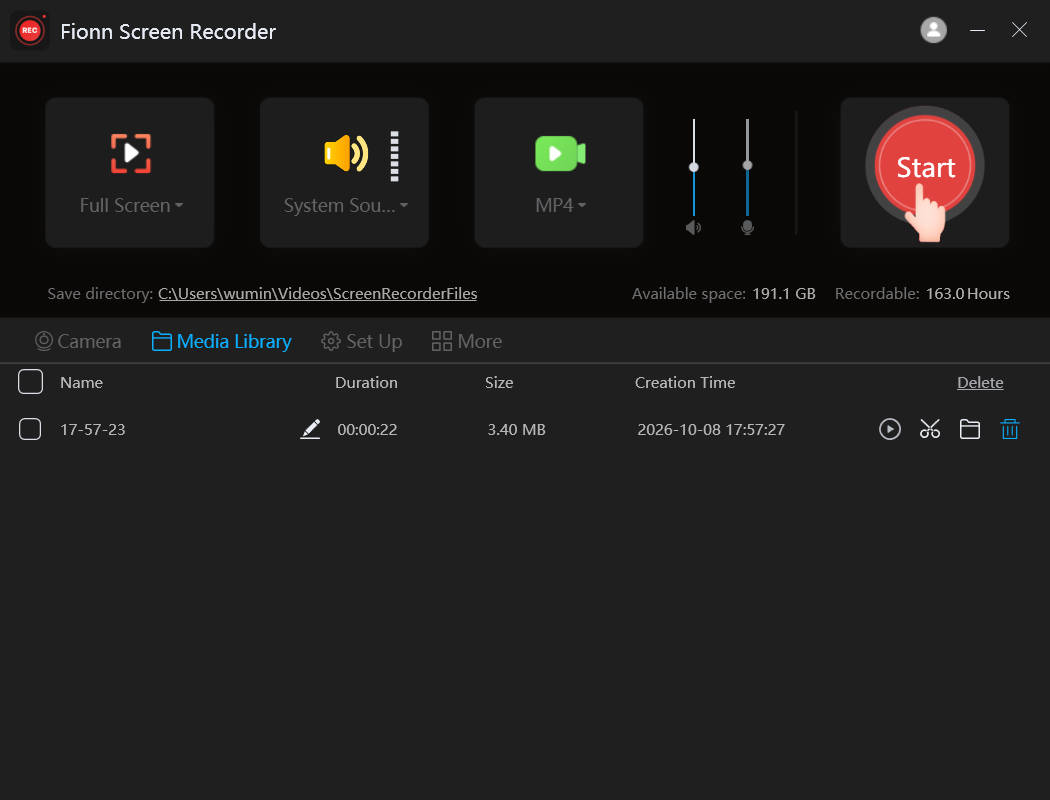
Verify: In Media Library, play the saved recording and confirm that the selected sound source is present. Check current plan details before relying on any resolution, duration, watermark, or recording-mode entitlement.
Why Does My Windows 11 Screen Recording Have No Audio?
| What You Hear | What to Check |
|---|---|
| Video recorded, but system audio is missing | Check the system or tab audio capture setting. |
| Computer sound is present, but microphone is missing | Check the microphone source, mute state, and microphone permissions. |
| Microphone is recorded, but computer audio is missing | Check the separate system-audio recording control. |
| Clipchamp browser-tab recording is silent | Check the selected tab and the Share audio toggle. |
| Recording has an echo | Check whether the microphone is picking up speaker output. |
| Preview sounds correct, but exported video is silent | Check export, playback, and audio-track settings. |
Tips for Checking Audio Before a Long Recording
- Decide before recording whether viewers need computer sound, a microphone, or both.
- Use headphones during a test if speakers could feed back into the microphone.
- Use a short saved test, not only a live preview, to validate the final result.
- Check the exported file in a normal media player before sharing it.
Conclusion
Choose Xbox Game Bar for a supported app or game, Clipchamp for a browser tab with shared tab audio, and Snipping Tool for a selected screen region when your version exposes the needed audio controls. Use Fionn Screen Recorder when you need full-screen, window, or region capture with configurable system and microphone sound. The reliable final check is the same for every method: save a short clip, then listen separately for computer sound and narration. If either source is absent, revisit that tool’s separate audio setting and retest before recording the full session.
Frequently Asked Questions
Can Xbox Game Bar record system audio on Windows 11?
Yes. In Xbox Game Bar’s Capturing settings, choosing All includes computer sounds. Microphone capture is controlled separately.
Why is my browser tab silent in a Clipchamp recording?
Select the browser tab itself in the sharing dialog and enable its audio-sharing toggle. The exact controls can vary by browser, Clipchamp version, and account.
Can Snipping Tool record audio while it captures the screen?
Modern Windows 11 Snipping Tool versions support recording screen video with system audio and microphone audio. Check the controls available in your installed version before recording.
Can I record system audio and a microphone together with Fionn Screen Recorder?
Yes. Its documented audio options include no sound, microphone only, and system sound with microphone.


