 Emily CarterScreen Recording
Set Windows to Extend, then choose Full Screen in Fionn Screen Recorder to capture your laptop display and external monitor seamlessly in one video. Use OBS Studio if you want to position and resize each display independently in the recording.
Fionn Screen Recorder provides full-screen, window, and region recording plus primary- and secondary-screen selection. The supplied documentation does not confirm that a single Fionn selection combines two extended displays into one file, so use a short test recording when that combined result matters.
Prepare the laptop and external monitor
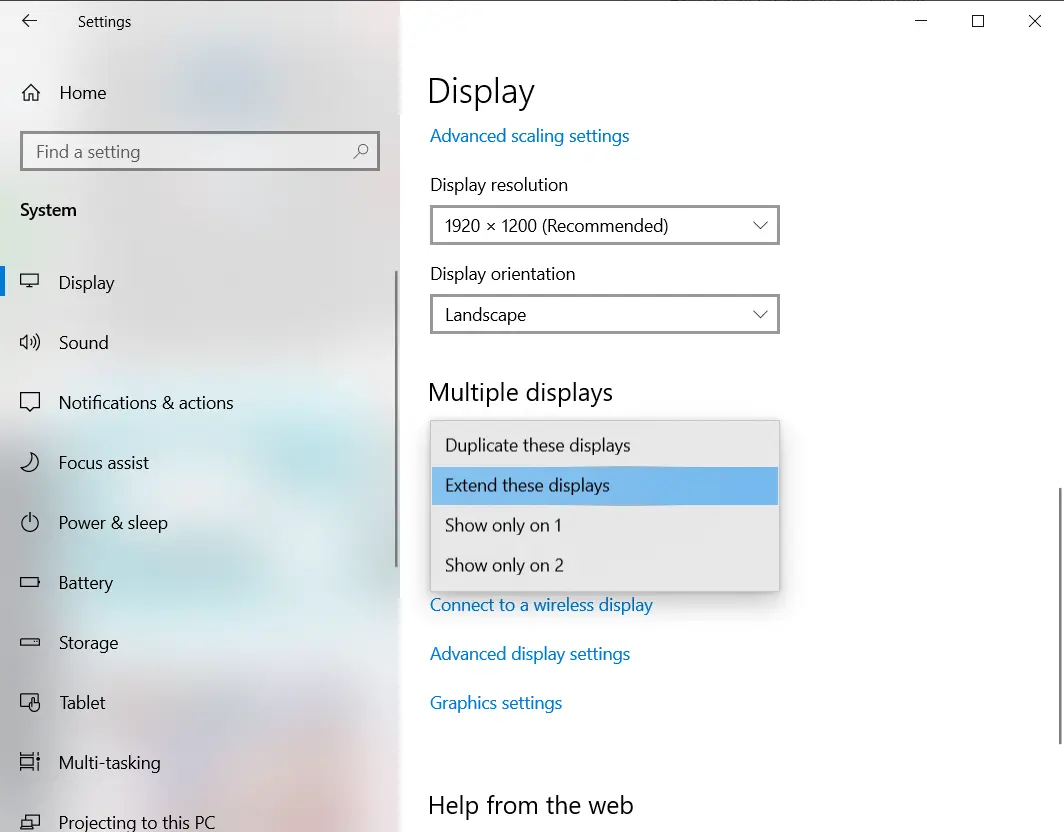
Connect the external monitor and arrange it before opening the recorder. Extend mode creates one desktop across both screens, letting you place distinct content on the laptop display and the external monitor.
- Open Windows Display settings, drag the display boxes into their physical arrangement, and select Apply.
- Press
Windows + Pand choose Extend . - Move the pointer from one display to the other to confirm the arrangement matches your desk.
Success at this stage means the pointer moves between displays as expected and each display can show different content. See Microsoft’s multiple-monitor setup guide .
Record both displays in one OBS Studio scene
Use OBS Studio when you want to control the position and size of each display in the final video. Add one Display Capture source per display, then arrange both sources in the same scene.
- Open OBS Studio, select Tools , and run the Auto-Configuration Wizard.
- In the Sources dock, select + and add a Display Capture source for the laptop display.
- Add a second Display Capture source for the external monitor.
- Open each source’s Display property and select its intended monitor.
- Drag and resize the two sources in the preview until both displays are visible in the layout you want.
- Check the Audio Mixer meters; if the wrong device or no device is active, open Settings > Audio and select the audio device manually.
- Review
Settings > Output
, then select
Start Recording
.
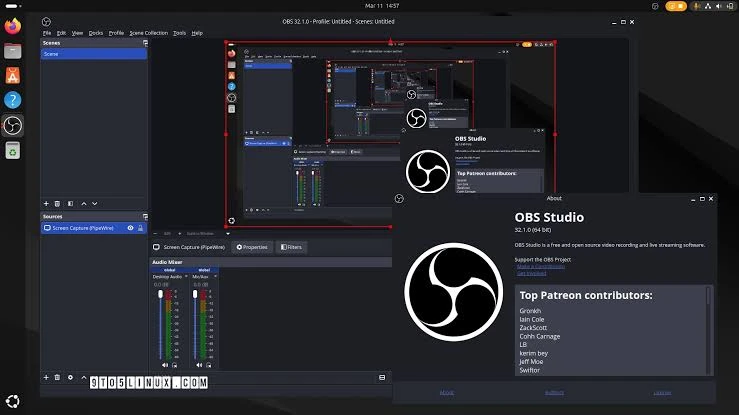
Make a short test recording before the full session. The task is complete only when the saved video shows both displays in the expected positions and contains the audio you intended to capture. See the official OBS Studio Quick Start Guide and Display Capture documentation .
Record with Fionn Screen Recorder
Fionn Screen Recorder can record your laptop display and external monitor seamlessly in one video. With Windows set to Extend, select Full Screen to capture both displays at the same time.
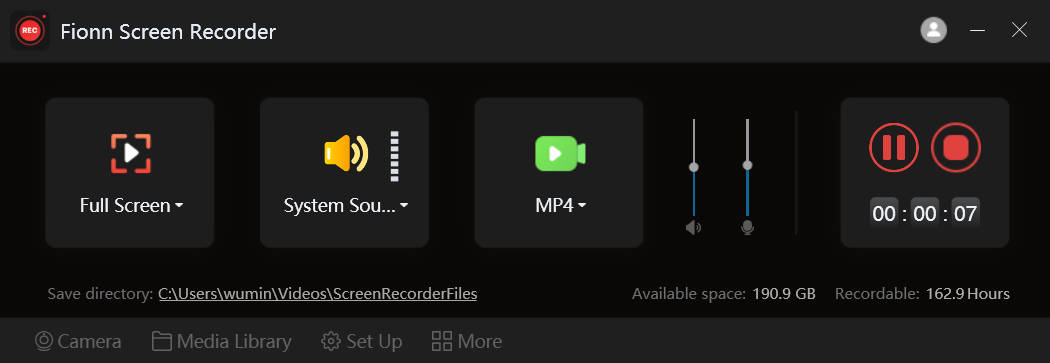
- Open Fionn Screen Recorder and select Full Screen to record both extended displays.
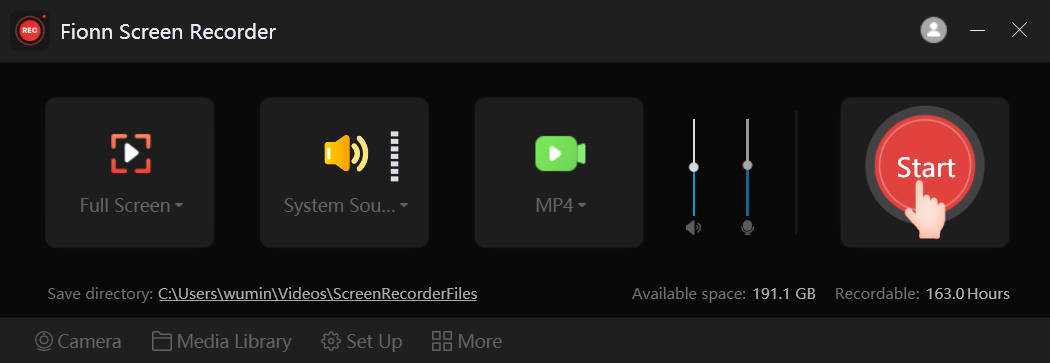
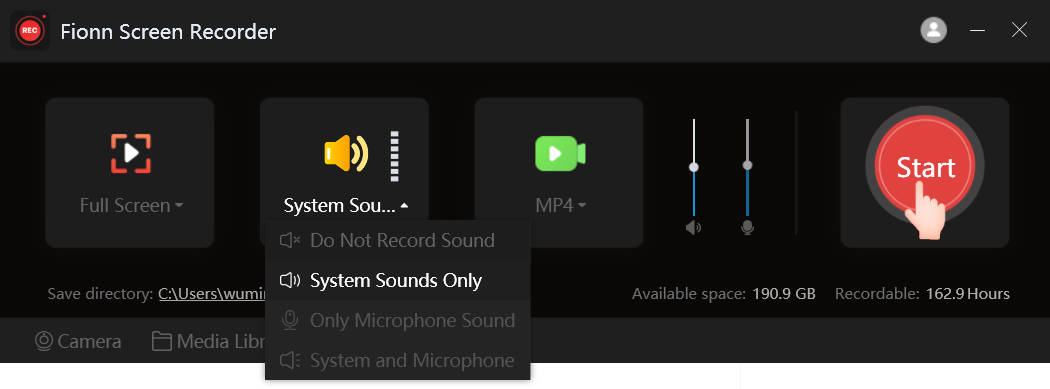
- Choose whether to record system audio, microphone audio, both, or no sound.
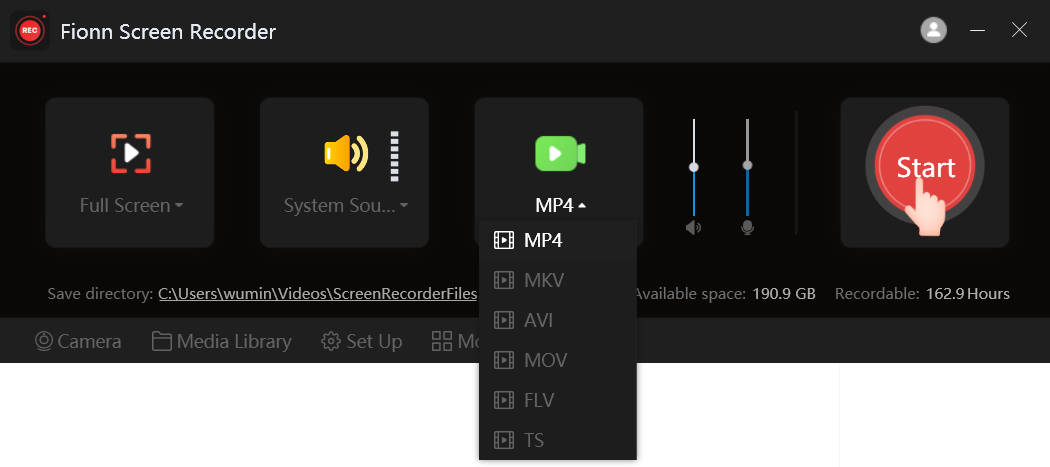
- Select MP4 or another video format before you start recording.
- Click Start to begin recording, then use Pause or Stop when you are finished.
- Open Media Library to play, edit, locate, or delete your recorded videos.
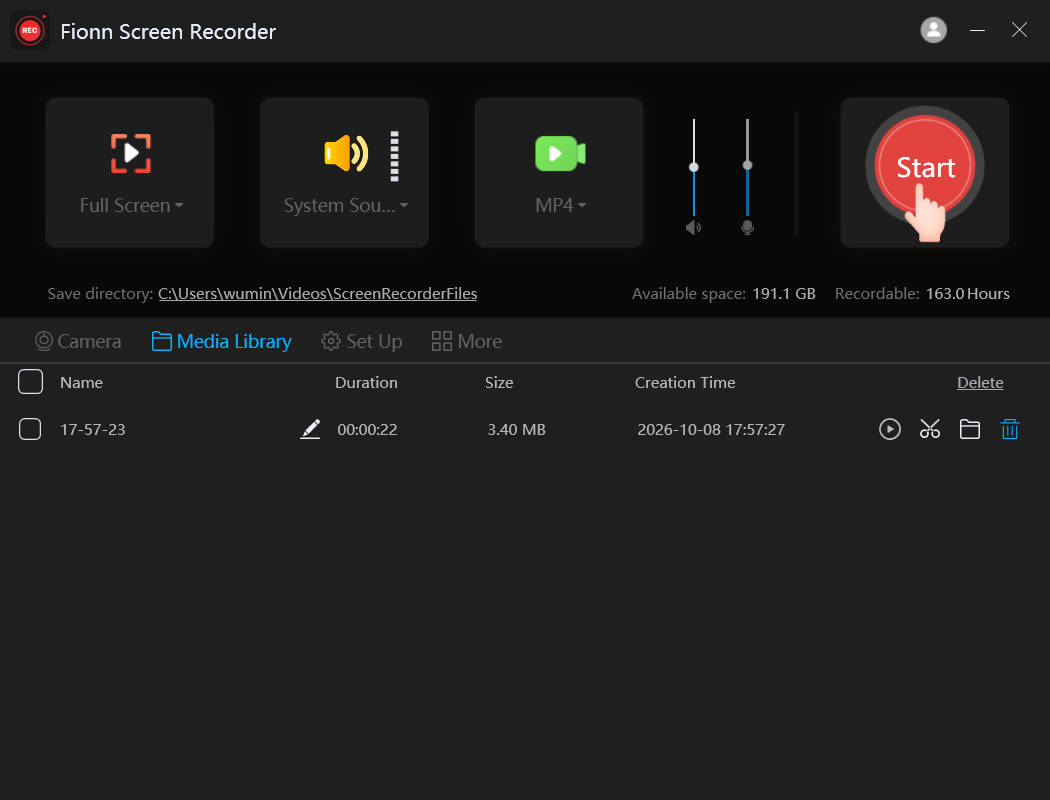
Open the saved video in Media Library and review its beginning, middle, and end. Continue with the final recording only if the clip contains the display area and audio you need. The documented workflow is available in the Fionn recording guide.
Troubleshooting checks before a final recording
If the external monitor is not available, return to Windows Display settings and confirm that it is detected and arranged. If both screens show the same content, change from Duplicate to Extend.
If OBS Display Capture is blank on a laptop, leave its capture method on Automatic first. If that fails, OBS documents selecting the Windows capture method manually. Its cross-GPU guidance lists Windows 10 version 1903 or later and OBS 27 or later as requirements for that documented method.
- Open the affected OBS Display Capture source and leave Capture Method set to Automatic.
- If capture still fails, choose the Windows capture method and confirm the selection.
- Record a short clip and inspect the saved file after changing the setting.
For the documented laptop capture guidance, see OBS Laptop Troubleshooting .
Conclusion
For seamless recording of both displays in one video, extend the Windows desktop and select Full Screen in Fionn Screen Recorder. Choose OBS Studio if you need a custom layout with independently positioned display sources.
Frequently Asked Questions
Can I record two monitors into one video?
Yes. In OBS Studio, add one Display Capture source for each monitor, select the corresponding display for each source, and arrange both sources in one scene before recording.
Should I use Extend or Duplicate for two-monitor recording?
Use Extend when each display should show different content. Duplicate mirrors the same desktop on both screens.
Why does OBS need two Display Capture sources?
OBS documents one Display Capture source per display. Separate sources let you select and arrange the laptop and external monitor in the same scene.
Can Fionn Screen Recorder create one combined recording of both extended displays?
Yes. Set Windows to Extend and select Full Screen in Fionn Screen Recorder to capture both displays seamlessly in one video.
How do I check audio before recording both displays?
In OBS, check that the intended Audio Mixer meters move and select devices manually in Settings > Audio if necessary. In Fionn Screen Recorder, choose system audio, microphone audio, both, or no sound before recording.


