 Emily CarterPrinter Drivers
Introduction
To set up an Epson printer on Windows, connect the printer, let Windows detect it, and print a test page. This guide provides three methods: Windows automatic installation, a model-specific download from Epson, and an optional driver-management assistant. Start with Windows because it is the simplest and lowest-risk route. Use Epson’s official driver when Windows provides limited features or cannot find a suitable driver. Consider the optional assistant only after trying those official methods.
Prerequisites
- Turn on the printer and clear any paper, ink, or hardware warning shown on its display.
- For USB setup, have a working USB cable and an available computer port.
- For network setup, connect the computer and printer to the same Wi-Fi network or local network.
- Find the exact model printed on the printer. Similar Epson model names can require different downloads.
- Use an administrator account if Windows requests permission to install software or a driver.
Quick Overview: Choose the Right Setup Method
| Situation | Best starting method | Main limitation |
|---|---|---|
| New USB or network printer | Windows Add device | Windows may install a basic driver with fewer model-specific features. |
| Missing functions or no suitable Windows driver | Official Epson support download | You must identify the exact model and Windows version. |
| Model or driver status remains unclear | Fionn Printer Driver | It is optional and does not replace Epson’s model documentation. |
The connection type matters before driver troubleshooting begins. If Windows cannot discover a network printer, verify the shared network first. Reinstalling a driver cannot correct a printer connected to a different Wi-Fi network.
Method 1: Add an Epson Printer Through Windows Settings
When to Use
Use this method first for a new or recently reset Epson printer. Microsoft states that Windows supports most printers without separate software and may install a connected printer automatically. Epson’s Windows 11 instructions also direct users to the Printers & scanners page when a generic driver is not installed automatically.
Step-by-Step Guide
- Connect the Epson printer by USB, or connect it to the same network as the computer.
- Open Start > Settings > Bluetooth & devices > Printers & scanners in Windows 11. In Windows 10, open Settings > Devices > Printers & scanners .
- Wait briefly and check whether the printer already appears under the installed devices.
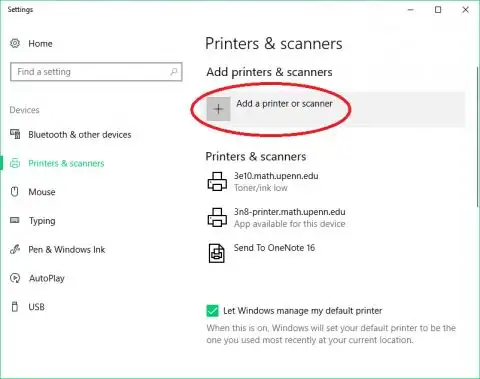
- Select Add device beside the printer if Windows finds it.
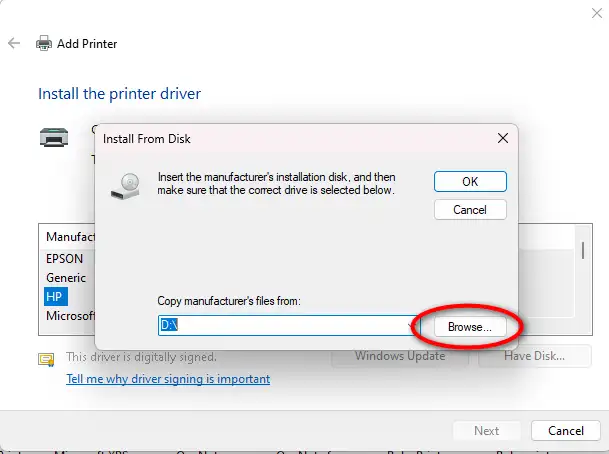
- Select Add manually if the printer is not listed, then choose the option matching its USB, network, or shared connection.
- Follow the prompts and allow Windows to finish installing the device.
Microsoft documents these routes in its official Windows printer installation instructions .
How to Verify
Open Printers & scanners , select the Epson printer, and open its printer properties. Choose Print Test Page . Successful output confirms that Windows, the selected port, the driver, and the physical connection can complete a basic print job.
If the printer appears but a required feature is missing, continue with the model-specific Epson package.
Method 2: Install the Model-Specific Driver from Epson
When to Use
Use Epson’s download when Windows reports that a driver is unavailable, installs only basic functionality, or omits a feature documented for your model. A model-specific package is also appropriate when Epson’s instructions explicitly require its software.
Step-by-Step Guide
- Read the complete model number from the printer label or control panel.
- Open the
official Epson Support page
.
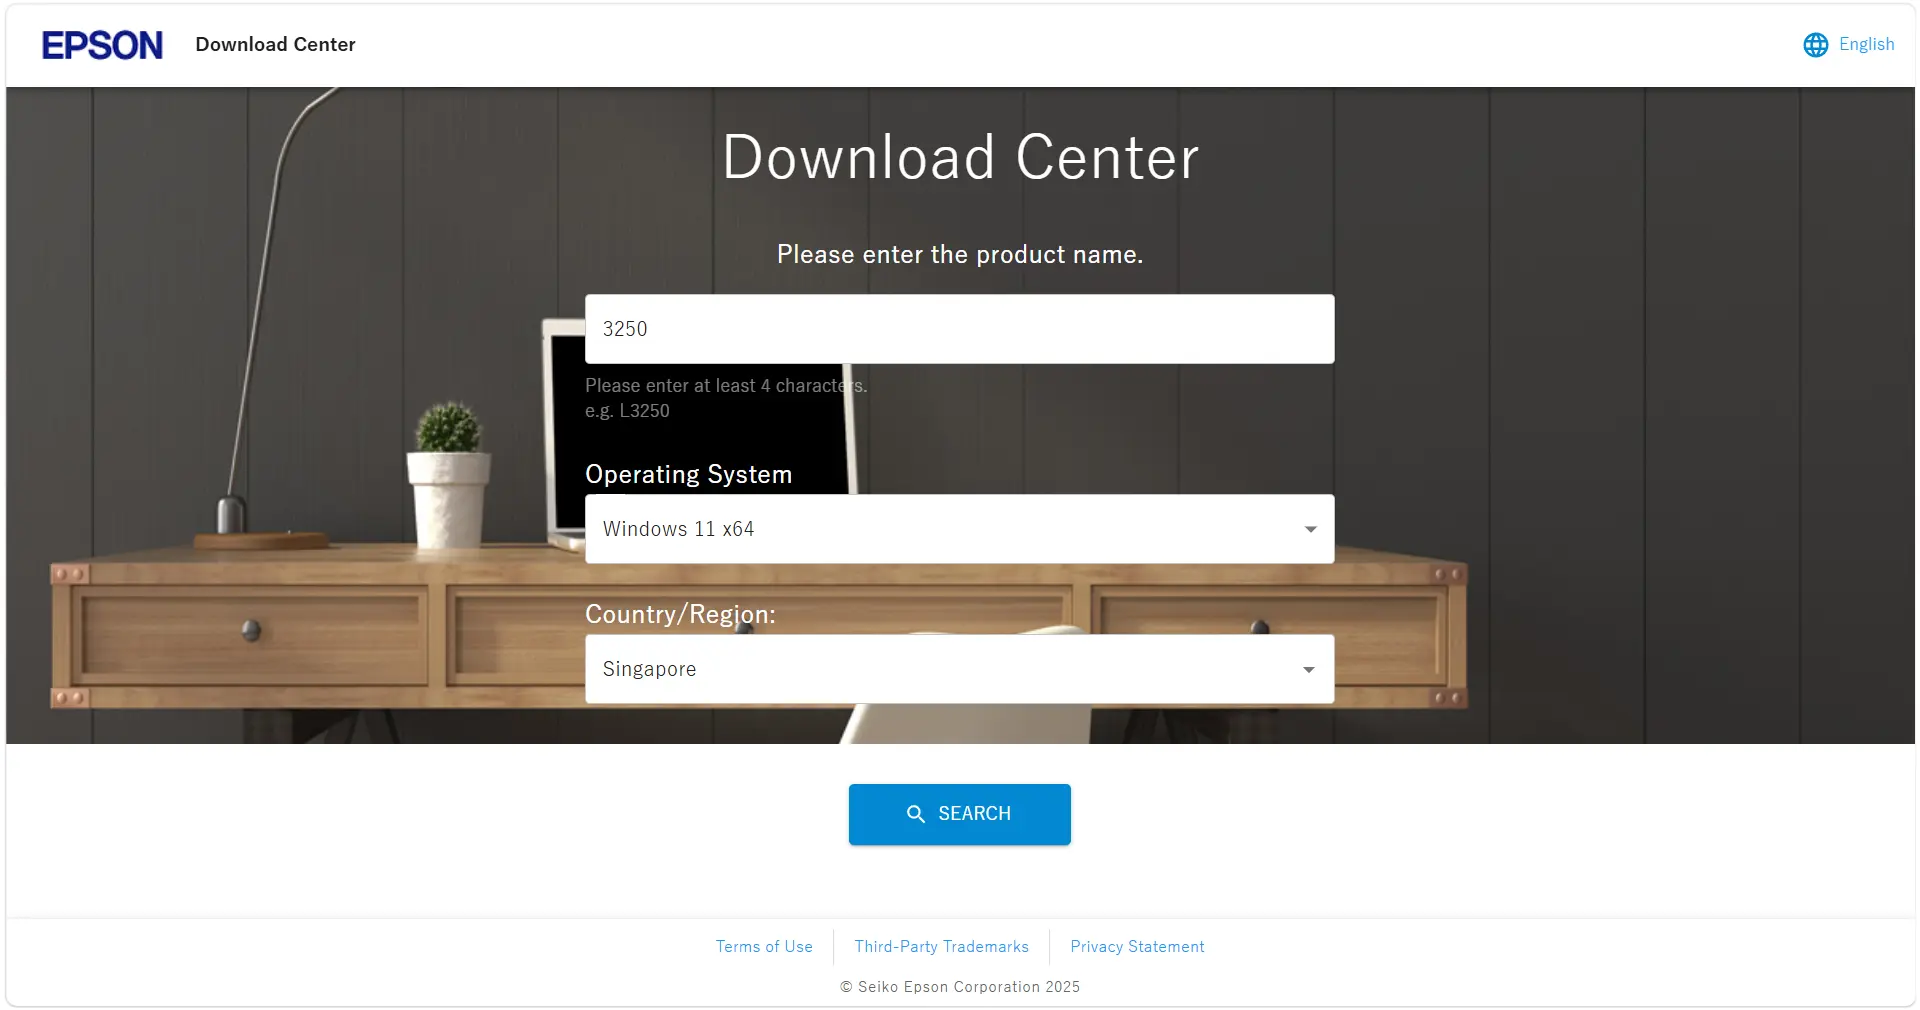
- Enter the exact model and open its product support page.
- Confirm that the detected operating system matches your Windows edition and system type.
- Download the applicable printer driver or setup package offered for that model.
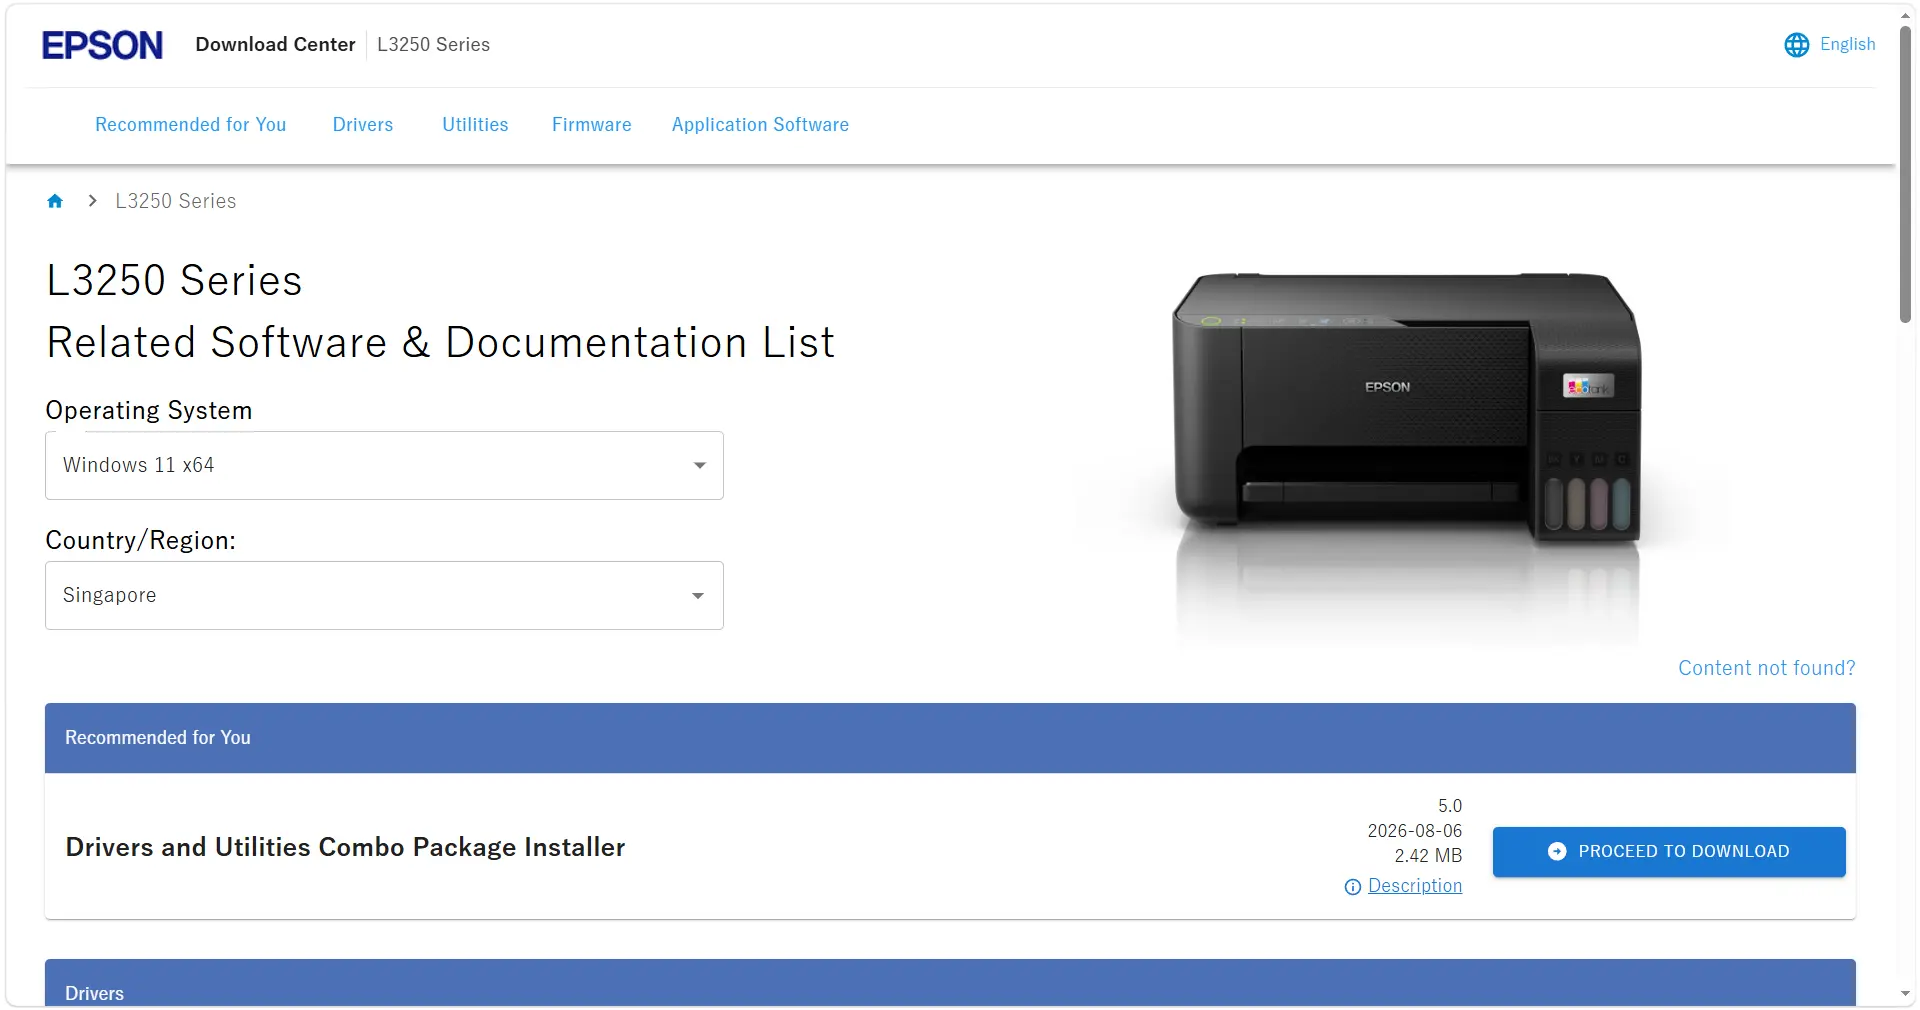
- Open the downloaded file and follow Epson’s prompts for the selected connection type.
- Restart Windows only if the Epson installer requests it.
How to Verify
Return to Printers & scanners and confirm that the correct model appears without a driver warning. Print a test page, then test one model-specific function you need. A successful test page alone does not prove that every optional scanning or finishing feature is installed.
If the official installer still cannot identify the model or driver state, an optional diagnostic assistant can provide another path.
Method 3: Use Fionn Printer Driver as an Optional Assistant
When to Use
Use this Windows option when you are unsure which driver is installed, cannot confidently identify a matching driver, or need to check more than the download itself. The product can identify many mainstream printer brands and models, offer automatic or manual matching, and examine driver, port, print queue, and Windows printer-service status.
Step-by-Step Guide
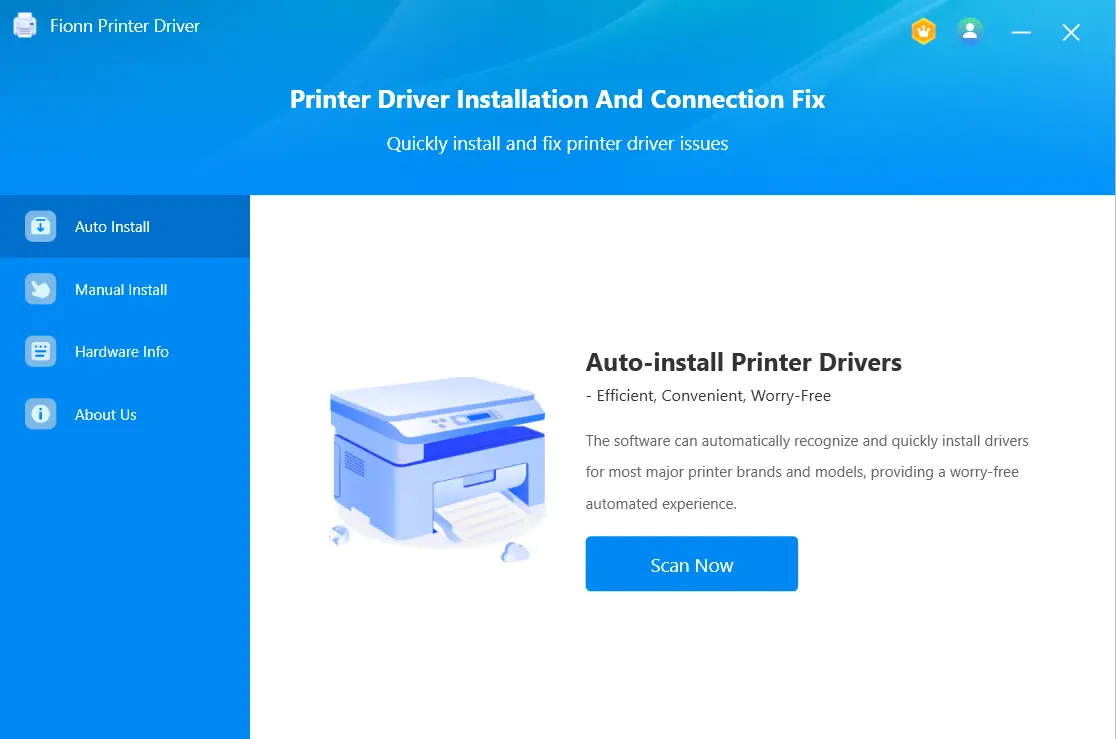
- Launch Fionn Printer Driver and click “Scan Now” to scan your computer for printer drivers and related issues.
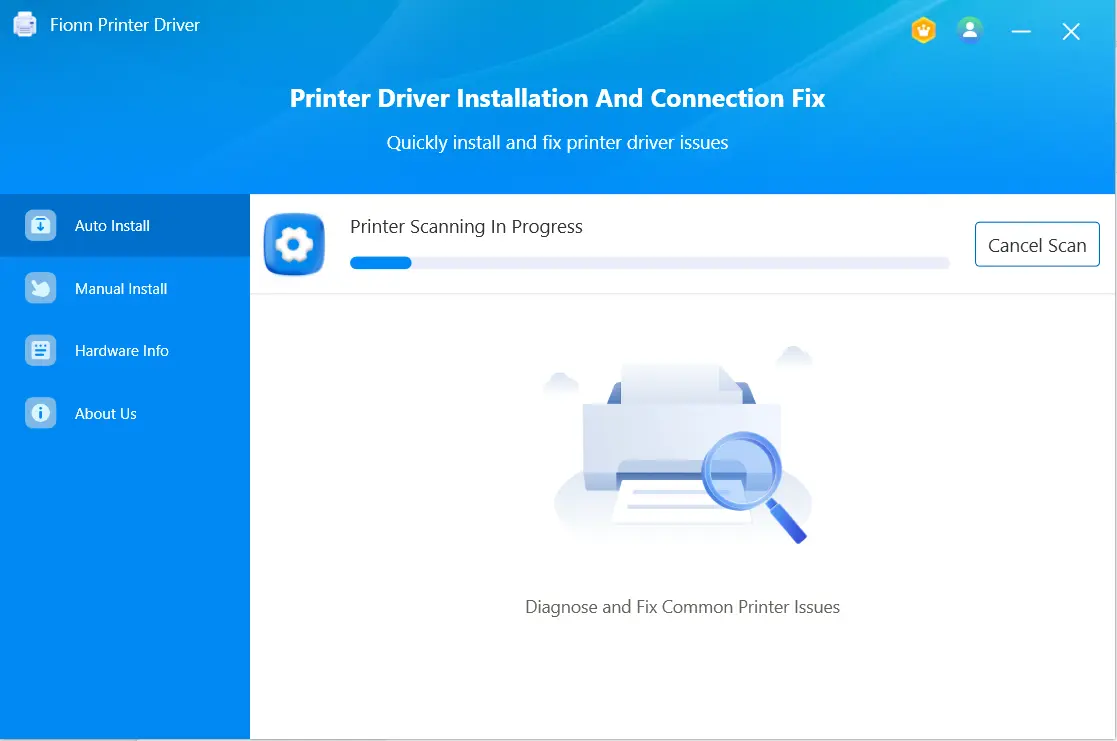
- Wait while Fionn Printer Driver scans your system for installed printers, drivers, and common printer issues.
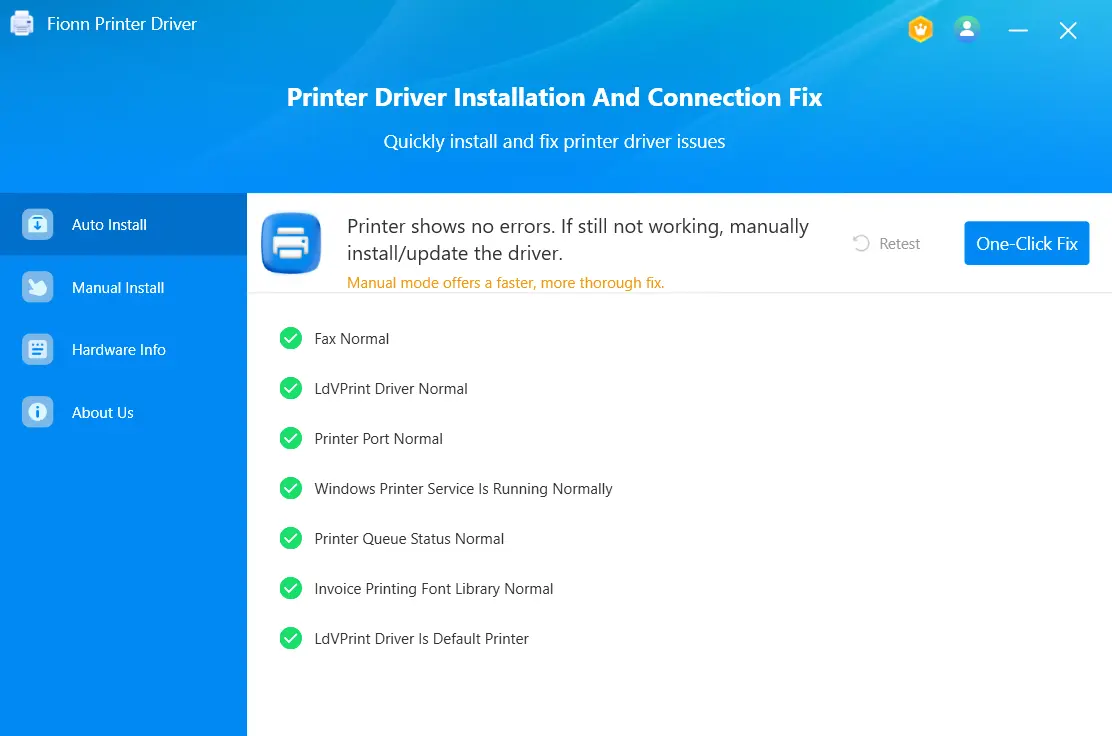
- After the scan finishes, click “One-Click Fix” to automatically install or repair the required printer driver.
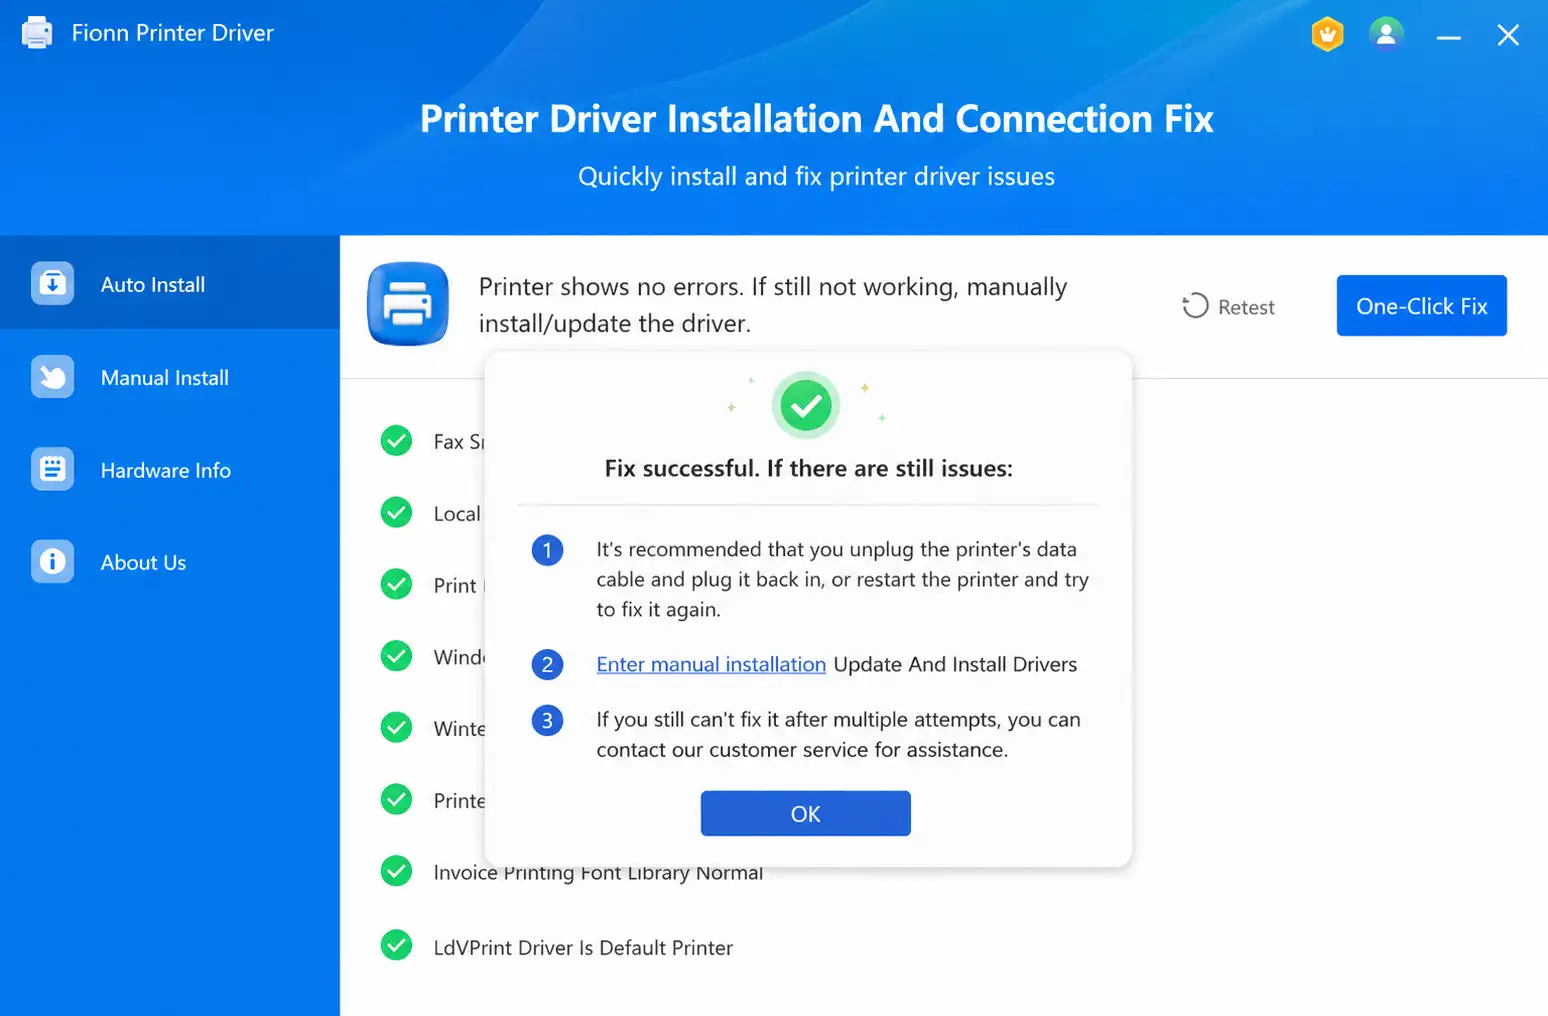
- Wait for the repair to finish and confirm that the printer issue has been fixed successfully.
How to Verify
Run the product’s detection again, then confirm that the driver no longer appears unavailable. Print a Windows test page afterward. If detection succeeds but printing does not, inspect the reported device state, port, service, and queue rather than repeatedly reinstalling the driver.
Tips for Avoiding Epson Printer Setup Problems
- Separate discovery from driver failure: a network printer that is not discoverable may be on another network. Confirm connectivity before replacing software.
- Use the test page as a layered check: it verifies basic printing, but not every scanner, duplex, color-management, or finishing feature.
- Keep only necessary print jobs: a paused or unfinished queue can make a correctly installed printer appear broken.
- Check the selected device: Windows may send output to another printer or a virtual print destination.
- Avoid unofficial driver mirrors: use Windows, Epson’s support site, or a verified tool described by its publisher.
Conclusion
Set up an Epson printer through Windows first, then verify it with a test page. Install Epson’s model-specific package only when automatic setup fails or leaves required features unavailable. If the model, driver, port, service, or queue remains unclear, Fionn Printer Driver offers an optional scan-and-repair workflow. Final verification should include both a Windows test page and the specific printing feature you need. If neither official method works, record the exact model, connection type, Windows system type, and error message before contacting Epson support.
Frequently Asked Questions
Can Windows install an Epson printer without a separate download?
Yes. Windows normally installs many connected printers automatically. Use Add device in Printers & scanners if installation does not start. A Windows-provided driver may support basic printing while leaving some model-specific features unavailable.
Why is my Epson printer not found during setup?
For a network printer, first confirm that the printer and computer use the same network. For USB, check the cable, power, and port. If the connection is sound, use Add manually or follow the exact model’s Epson instructions.
Should I remove the existing printer before installing another driver?
Not automatically. First print a test page and identify what is missing. Remove and reinstall the device when the current installation is damaged, duplicated, or specifically covered by the troubleshooting instructions. Unnecessary removal can discard working settings.
How do I know whether the setup is complete?
The correct Epson model should appear in Printers & scanners without a driver warning. A test page should print through the intended connection. Also test any required model-specific capability, because basic printing does not verify every optional feature.
What should I do when no matching driver is available?
Recheck the complete model number, Windows edition, and system type. Search Epson’s official support page again and review the model documentation. You can also let Windows search for a suitable driver or use an optional driver-matching assistant. Avoid downloads from unverified mirrors.


