 Emily CarterVoice Changer
To change your voice in TeamSpeak 3, set up an effect in Fionn VoxMagic , select its virtual input in the TeamSpeak 3 capture profile, and perform two checks: a local level test in the client and a short conversation with another participant. Previewing in VoxMagic confirms processing only on your computer; the other participant confirms the final result.
This guide is for Windows and the desktop version of TeamSpeak 3. In the installed client, select the VoxMagic virtual input under the name shown on your system.
Download Fionn VoxMagic for Windows
Prepare Your Changed Voice in Fionn VoxMagic
VoxMagic creates a virtual microphone for third-party applications, lets you select input and output devices, and lets you enable Voice Changer. This makes it suitable as a processed audio source for voice chat.
When you first start it, select your physical microphone and headphones in VoxMagic device settings and wait for the essential components to install if the app prompts you.
Connect headphones: sound from external speakers can enter the microphone and cause feedback.
- Open the real-time voice changing section and select a voice effect, such as Mia. The selected effect will be highlighted and appear in the bottom control panel.
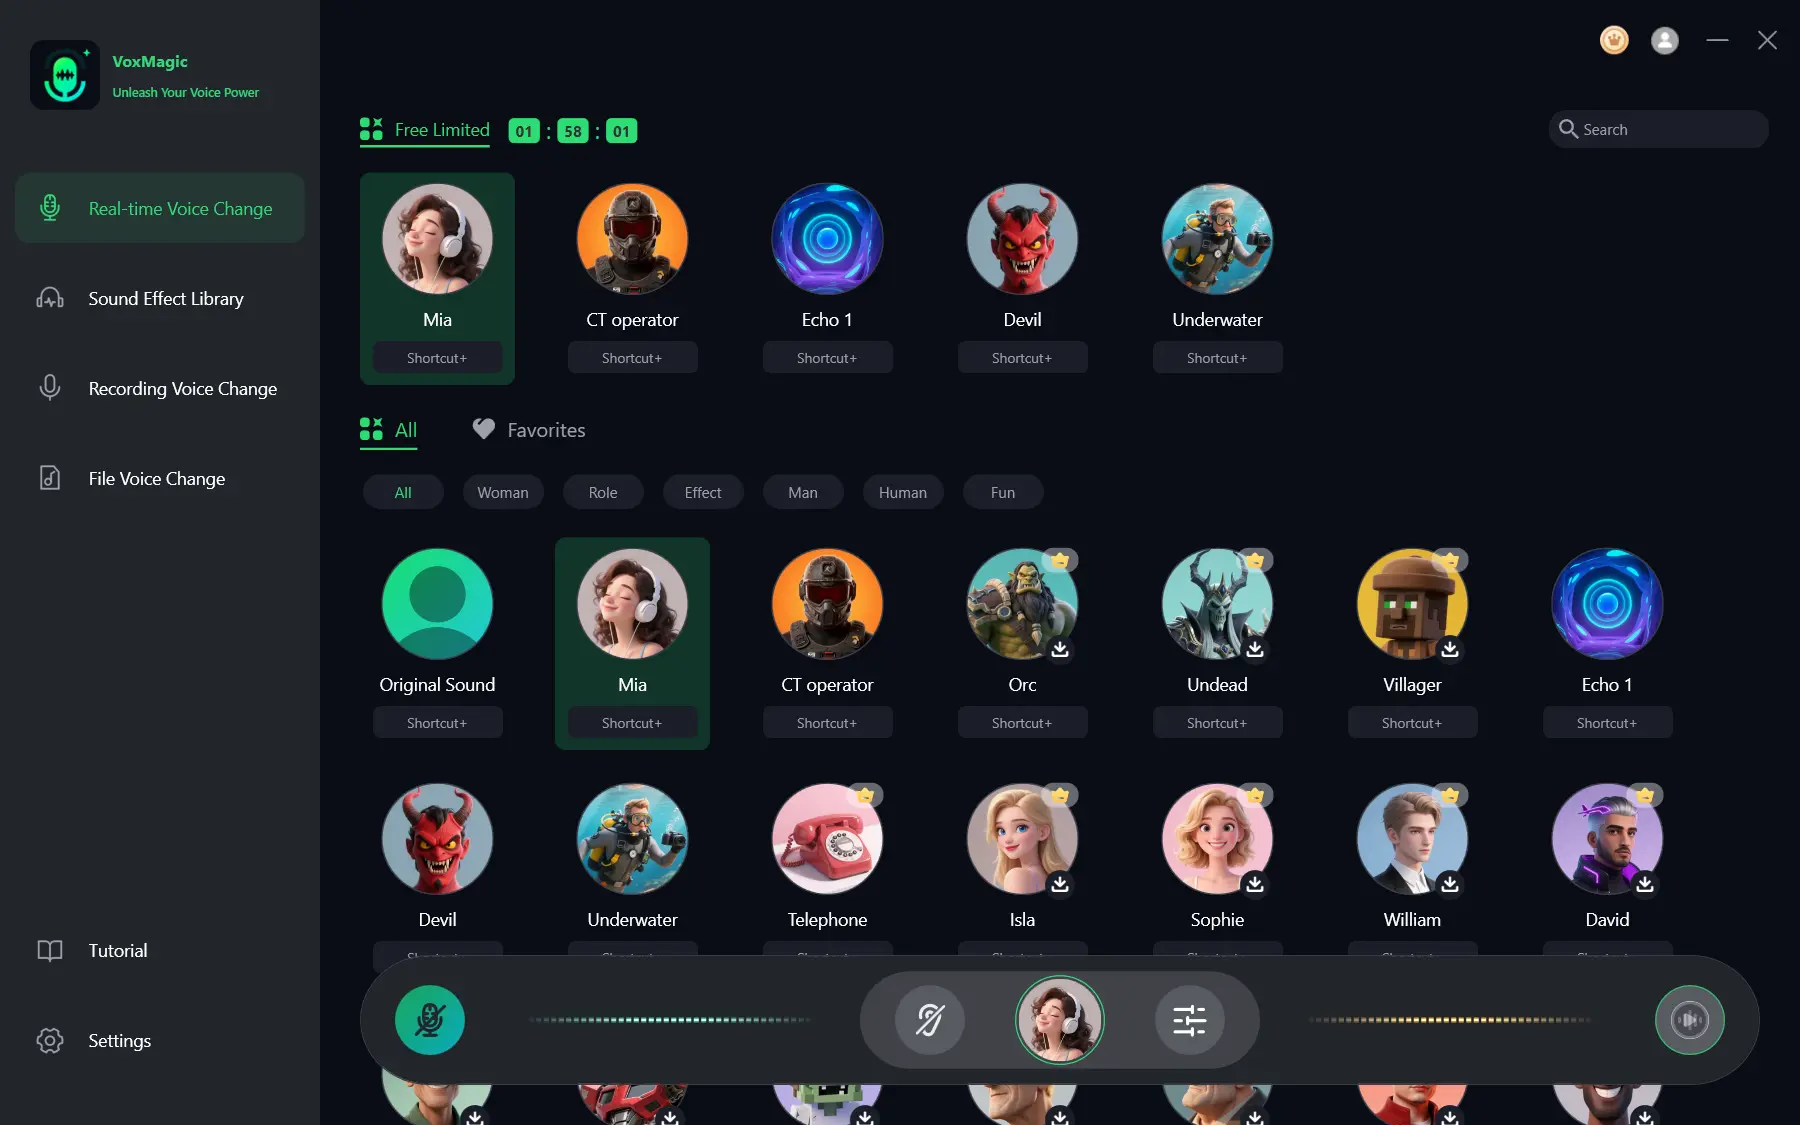
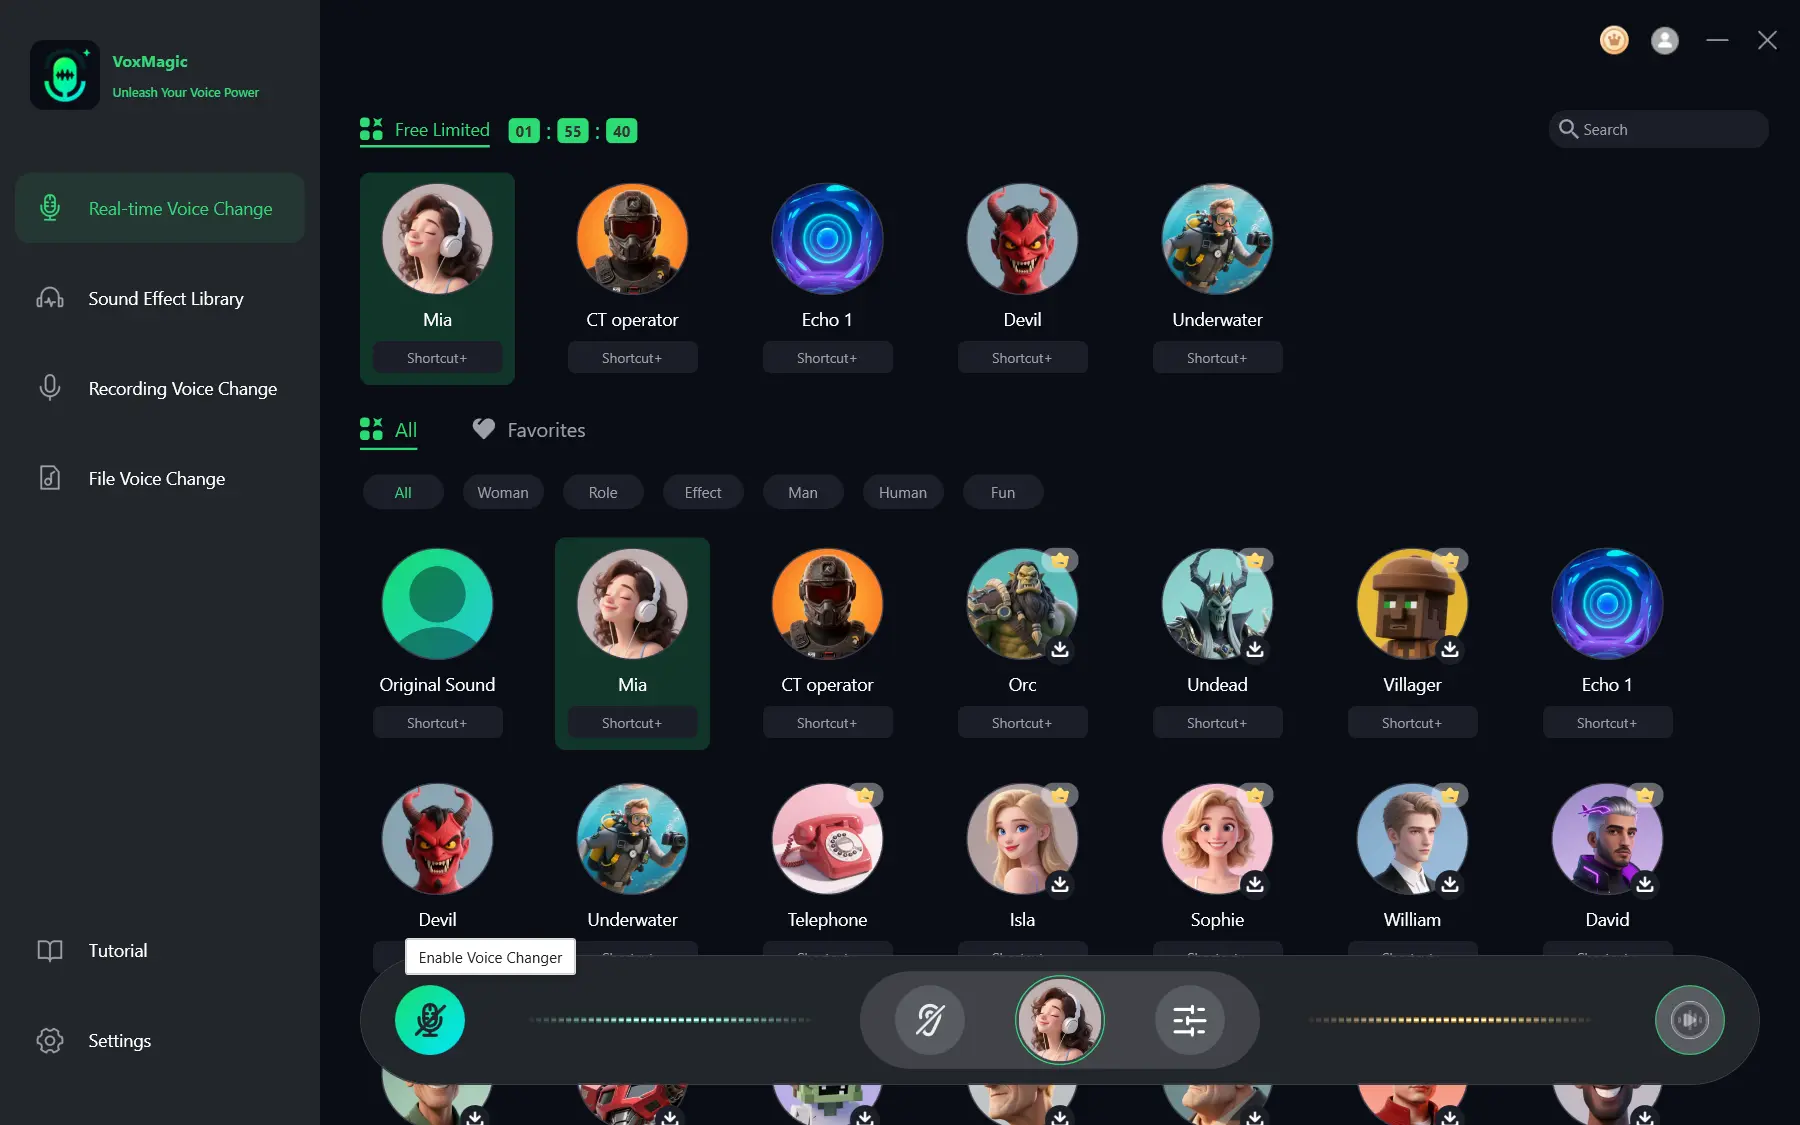
- Click the microphone button labeled Enable Voice Changer in the lower-left corner of the control panel.
- Click the ear icon on the bottom panel to enable voice preview. Listen through your headphones to check the selected effect.
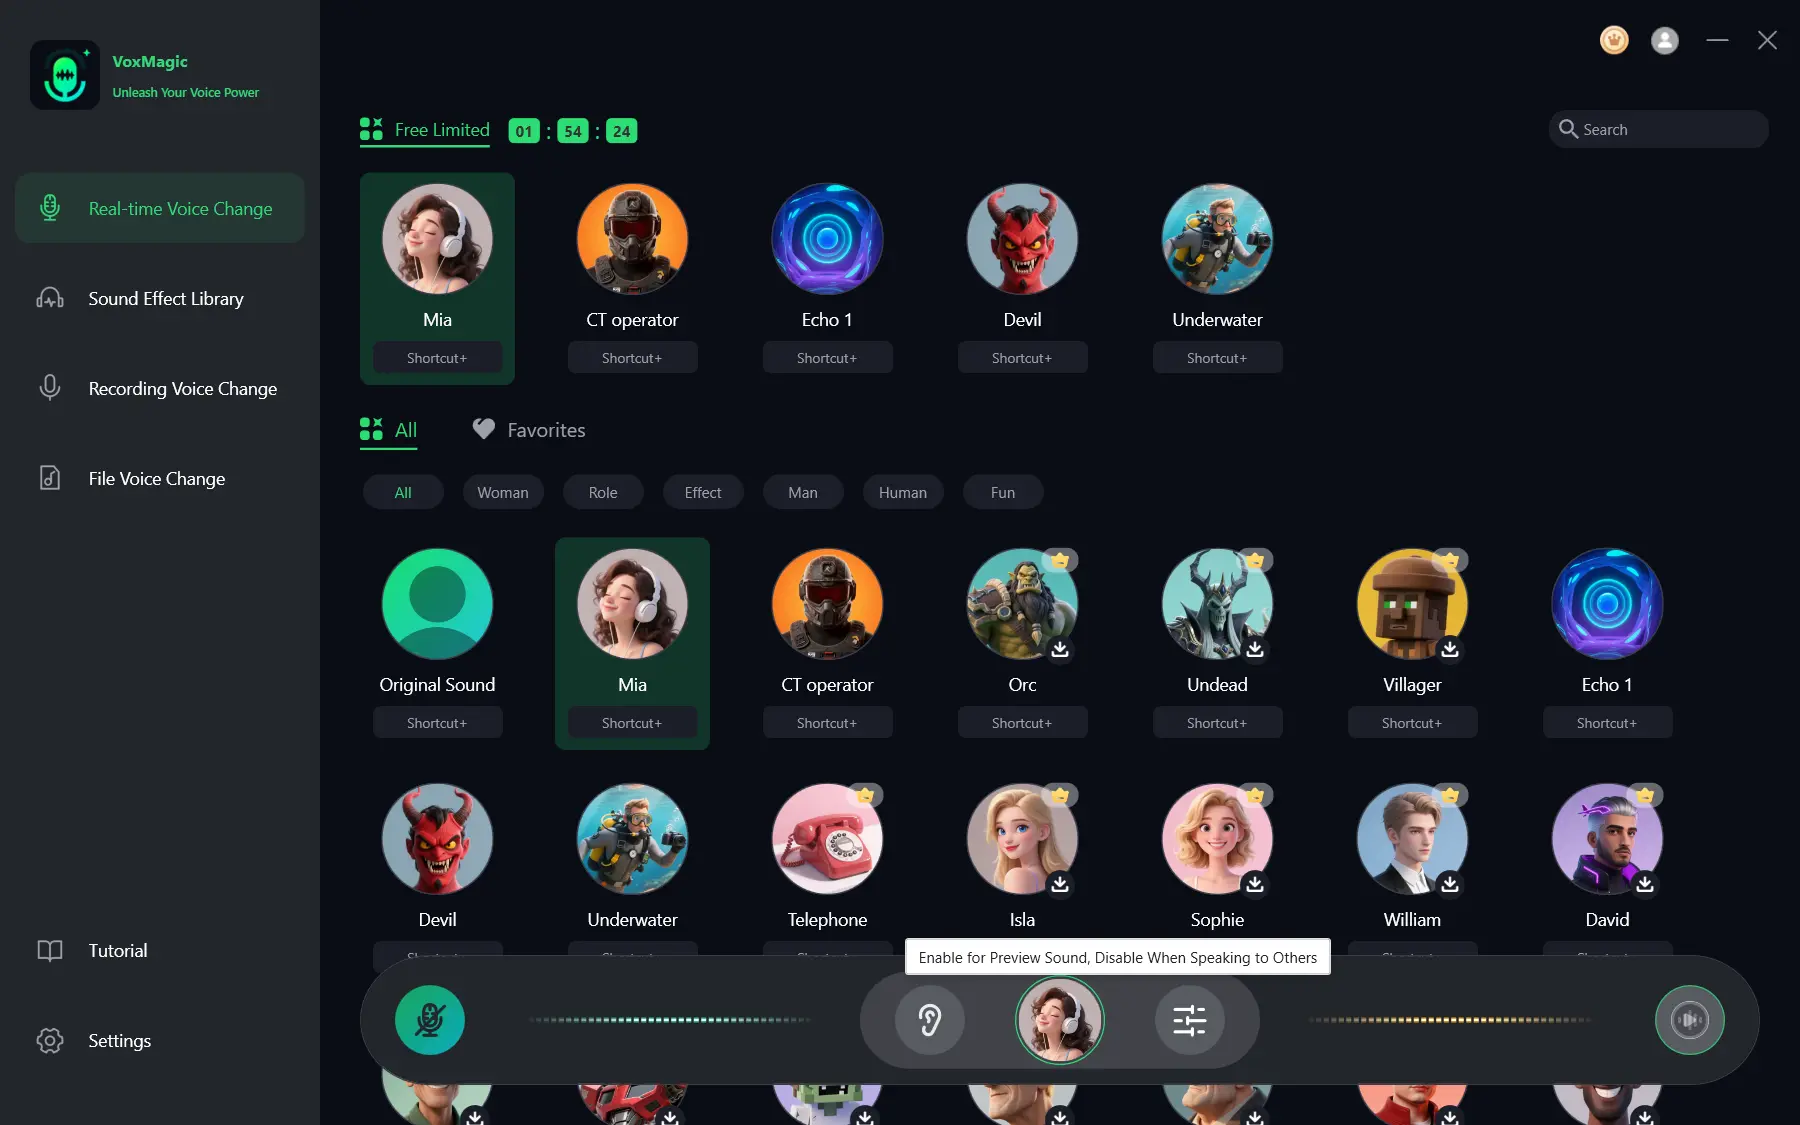
Say a short phrase: the meters should react to your speech, and you should hear the selected effect through your headphones. Then continue with the TeamSpeak input setup.
Select the Virtual Input and Test Transmission in TeamSpeak 3
In the English TeamSpeak 3 desktop interface, open Tools → Options → Capture . These instructions apply to TS3 for Windows, not the separate TeamSpeak 6 client.
- Select the profile you use from the
Profiles
list. In the
Capture Device
field, choose the VoxMagic virtual microphone under the name displayed on your system instead of your physical microphone or
Default
.
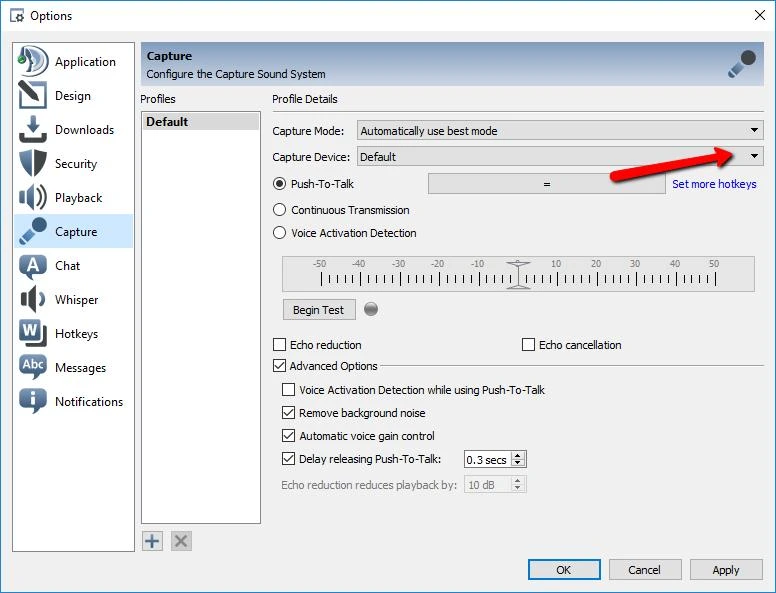
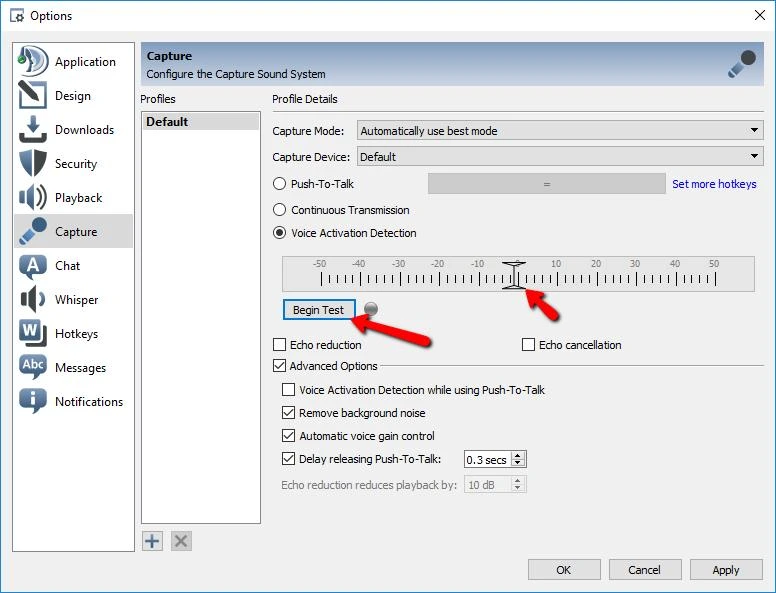
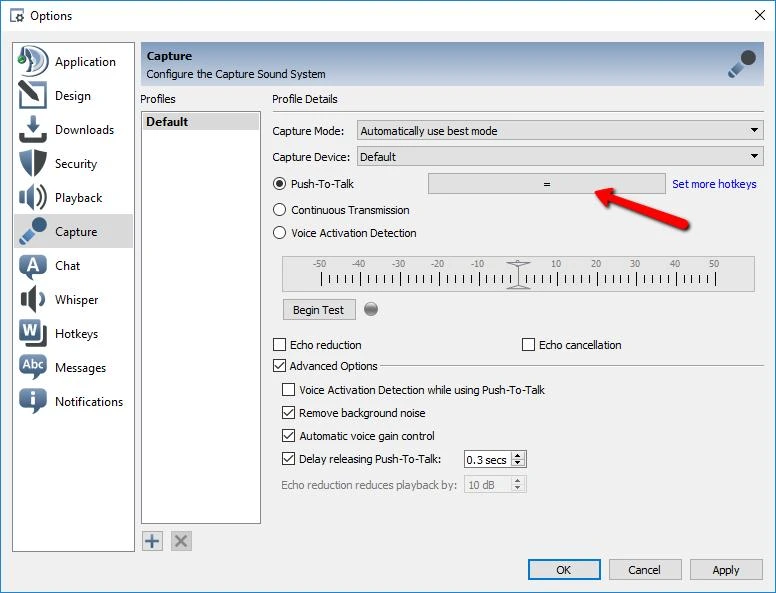
- Select Push-To-Talk if you want to transmit audio only while holding an assigned key. Click the key assignment field and set a convenient shortcut. Alternatively, select Voice Activation Detection to activate transmission when you speak; adjust the threshold during the local test. Continuous Transmission always transmits audio and is suitable only for a deliberate need, such as brief controlled diagnostics, rather than normal use.
- In the same section, click
Begin Test
and say a phrase. With Push-To-Talk, hold the assigned key; with voice activation, adjust the threshold so normal speech activates transmission but background noise does not. End the test and save the settings with
Apply
or
OK
.
- Join the required channel, make sure your microphone is not muted, and confirm that you have permission to speak. Say a phrase and ask another participant to confirm they can hear the selected effect rather than your original voice.
The local test checks audio capture in TS3; a conversation with a participant checks transmission to the channel. TeamSpeak capture settings and microphone testing ; Capture Device and capture profiles .
When to Check the Capture Profile in a Bookmark
The Capture Profile stores capture settings, including the Capture Device . The playback profile determines where you hear other participants, not which voice you send. A server bookmark can assign a separate capture profile.
Check the bookmark only if you have multiple profiles or a separate profile is assigned for the connection: open Bookmarks → Manage Bookmarks , select the server, and click Go Advanced . In the Capture Profile field, select the profile where the VoxMagic virtual microphone is configured, then save the changes. With one profile and no connection-specific settings, you do not need to create a Bookmark. How profiles, devices, and bookmarks work together .
If the Effect Cannot Be Heard in TeamSpeak 3
The Effect Works in VoxMagic, but Others Hear Your Normal Voice
In Tools → Options → Capture , check the Capture Device in the profile you use: the VoxMagic virtual input must be selected, not the physical microphone. Make sure Voice Changer is enabled. If the issue occurs only when connecting to one server through a bookmark, check its assigned Capture Profile.
There Is No Sound in TeamSpeak
First, check whether VoxMagic meters respond to speech, then start Begin Test in Capture. If the local test is audible but the channel is silent, check whether the microphone is muted in the client, the selected transmission mode, and your permission to speak in the current channel. Ask the other participant whether they have muted your user.
Push-To-Talk Does Not Work
Check the assigned key in the Capture settings for the profile you use and hold it while speaking. Make sure Push-To-Talk is selected rather than voice activation. If the failure is tied to a specific connection, compare the capture profile with the profile specified in its bookmark.
Voice Activation Detection Misses Speech or Transmits Noise
During the local test, speak at a normal volume and adjust the activation threshold. A threshold that is too high misses quiet speech; one that is too low can activate transmission from background noise. Check the threshold again after changing the voice effect. Do not replace this setting with continuous transmission.
The Virtual Microphone Is Missing from Capture Device
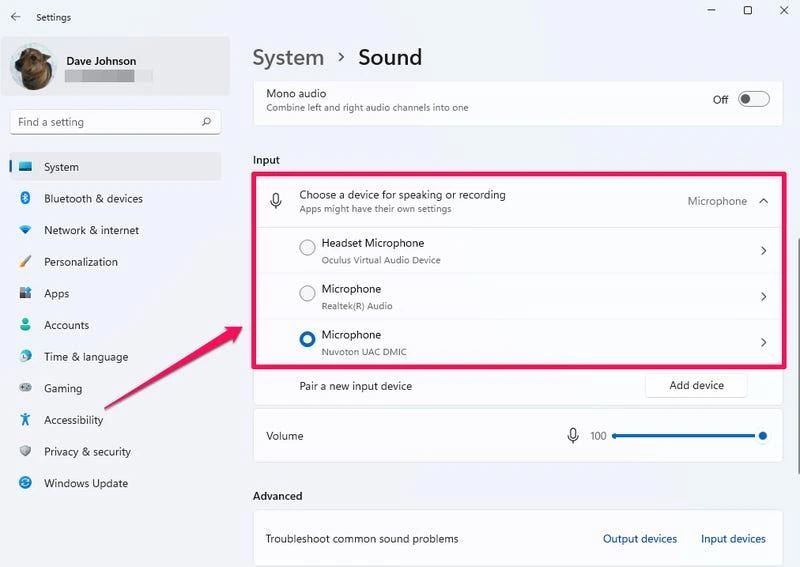
Make sure VoxMagic setup and installation of its essential components are complete. Check whether the virtual input is available among Windows recording devices, then reopen the Capture Device list in TS3. If the device is also missing in Windows, fix its installation in VoxMagic first. A physical microphone cannot replace the processed input.
There Is Echo or the Voice Is Unclear
Use headphones and turn off VoxMagic preview before speaking so sound from speakers or local monitoring does not interfere with testing. Start with a less pronounced effect and only the minimum necessary noise reduction; change one setting at a time and compare a short phrase with another participant. Do not enable additional filters at random.
TeamSpeak guidance on capture, transmission modes, and channel permissions .
Conclusion
Set up the input and output in VoxMagic, choose an effect, and enable Voice Changer. Then assign the displayed virtual input in the active TeamSpeak 3 capture profile, select Push-To-Talk or voice activation, and test capture locally. The final required step is asking another participant to confirm that they received the processed voice.
Frequently Asked Questions
Do I Need to Change the Playback Device in TeamSpeak 3?
Not to transmit a changed voice: the Capture Device determines the source of sent audio. The playback device determines which headphones or speakers you use to hear participants; change it only if you need to change that output or cannot hear other participants.
Why Does TeamSpeak 3 Use My Regular Microphone Instead of VoxMagic?
Check the source in the active Capture Profile. It may still contain the physical microphone or Default; additionally, a server bookmark may select another saved profile. Explicitly select the virtual device in the profile used for that connection.
Does This Guide Work for TeamSpeak 6?
No. The menus and profiles in this guide apply to classic TeamSpeak 3. For TeamSpeak 6, use that client's instructions instead of automatically applying the Tools → Options → Capture path.


