 Emily CarterData Recovery
Introduction
To recover a deleted thesis, stop saving files to the affected drive and check the Recycle Bin first. If the document is absent, restore a backed-up copy through OneDrive or File History. For a permanently deleted local file, scan the drive with Windows File Recovery or Fionn Data Recovery. The four methods below follow that order, from the quickest built-in option to storage-level recovery. Recover the document to a different drive, then open it and verify its contents before resuming work.
Before Recovery: Stop Writing to the Affected Drive
Deleting a local file does not necessarily erase every recoverable trace immediately. However, new downloads, installations, updates, and saved documents may reuse its storage space. Close unnecessary programs and avoid creating files on that drive.
First identify what actually happened. A deleted thesis requires Recycle Bin, backup, or storage recovery. Missing edits in an existing document call for version history. A document that was never saved may instead appear in Word's Document Recovery or Recover Unsaved Documents area. These are different recovery paths.
Choose the Right Method
| Method | Best For | Efficiency | User Effort |
|---|---|---|---|
| Recycle Bin | A recently deleted local thesis still in the bin | Immediate | Low |
| OneDrive or File History | A thesis previously synchronized or backed up | High when a suitable copy exists | Low |
| Windows File Recovery | A permanently deleted local file without a backup | Depends on overwrite activity and search scope | High; command-line work required |
| Fionn Data Recovery — Recommended for guided scanning | An emptied Recycle Bin or deleted thesis on supported local or external storage | Quick, deep, and RAW scan options | Moderate |
A backup is preferable to storage scanning because it restores a known copy. Use a recovery scan only when ordinary restoration cannot supply the thesis.
Method 1: Restore the Thesis from the Recycle Bin
When to use: Choose this method when the thesis was deleted from a local Windows folder and the Recycle Bin has not been emptied.
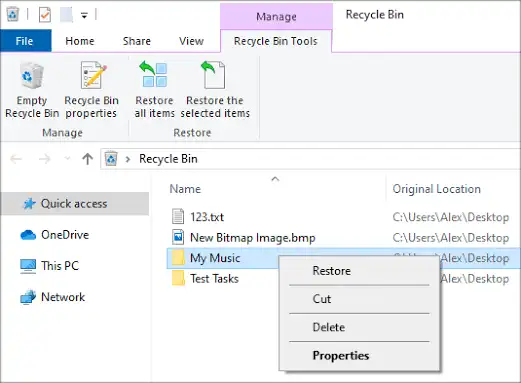
- Open Recycle Bin from the desktop.
- Search for the thesis by its filename or sort the list by deletion date.
- Check the original location to confirm that you found the intended document.
- Right-click the thesis and select Restore.
- Open its original folder and confirm that the restored file is present.
Verification: Open the restored thesis, check several chapters, and confirm that its modification date matches the copy you expected.
Method 2: Recover the Thesis from OneDrive or File History
When to use: Use this method when the thesis was synchronized with OneDrive or its folder was protected by File History before deletion.
Restore a OneDrive copy
- Sign in to the OneDrive account that stored the thesis.
- Open the OneDrive Recycle bin.
- Select the thesis and choose Restore.
- Return to its restored folder and download or open the document.
Microsoft documents this process on its official OneDrive restoration page. If the file still exists but recent work is missing, inspect its version history instead of searching for a deleted file.
Restore a File History copy
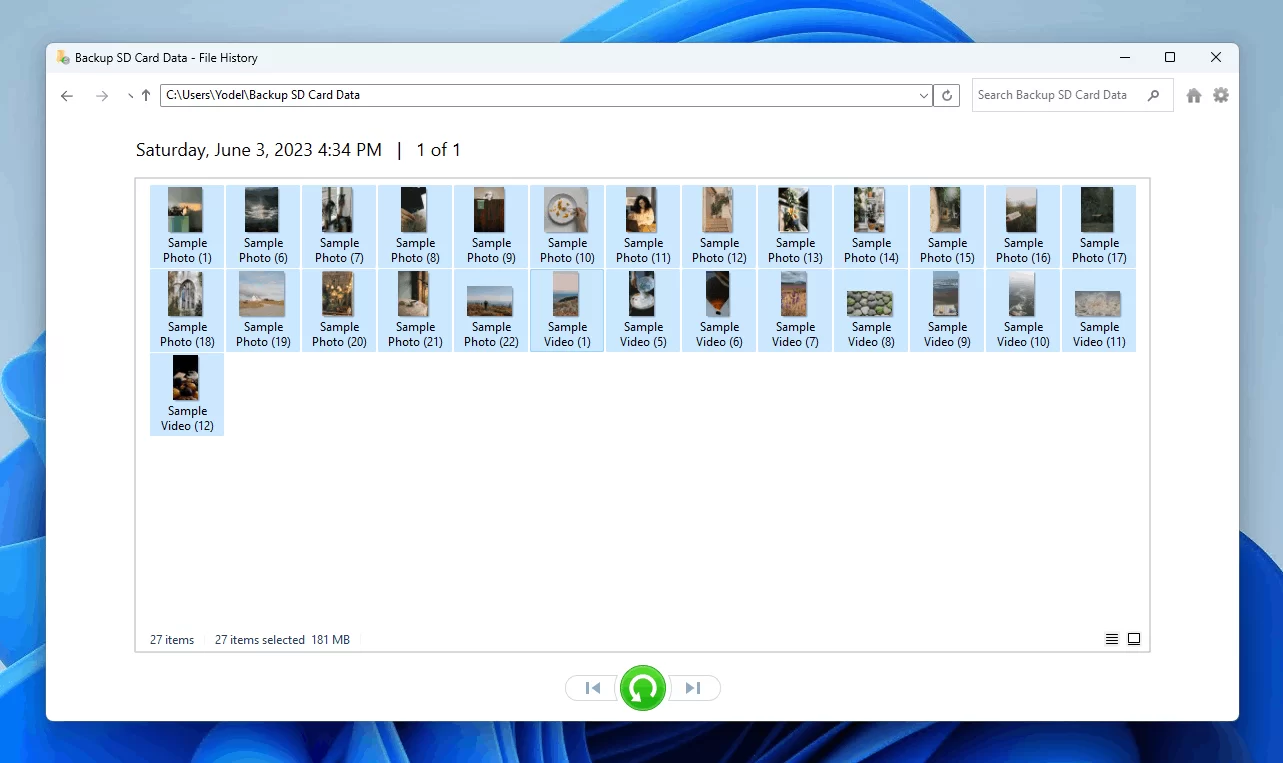
- Open File Explorer and navigate to the folder that previously contained the thesis.
- Right-click the folder and select Restore previous versions.
- Select a dated version from before the deletion.
- Use Open in File History to inspect it when that option is available.
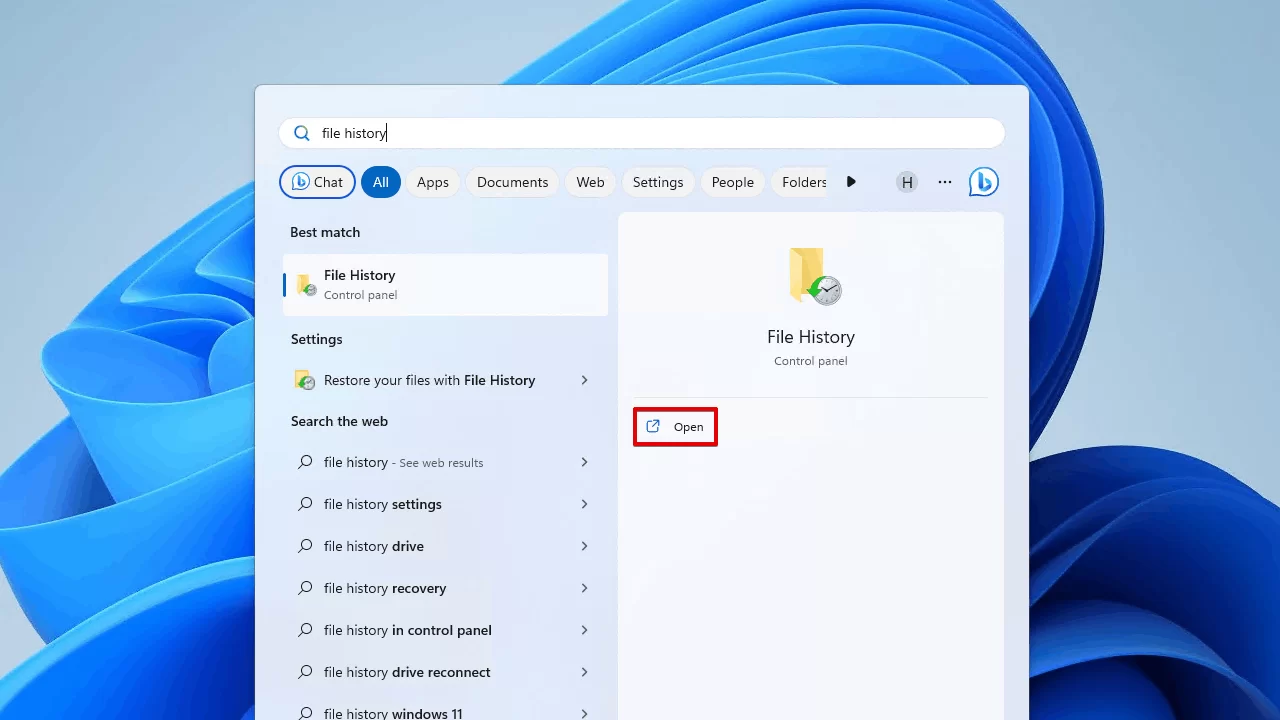
- Choose Restore to and select a separate folder to avoid replacing current material.
Verification: Compare the restored document's date, file size, chapter count, and references with any submitted draft or exported PDF. Microsoft's File History instructions confirm that previous versions can be previewed and restored to another location.
Method 3: Recover a Permanently Deleted Thesis with Windows File Recovery
When to use: Use Microsoft's command-line utility when the thesis is permanently deleted from a local disk and no usable backup exists. The source and destination must be different drives.
- Connect a destination drive with enough free space for recovered results.
- Install Windows File Recovery from the Microsoft Store using Microsoft's official Windows File Recovery guide.
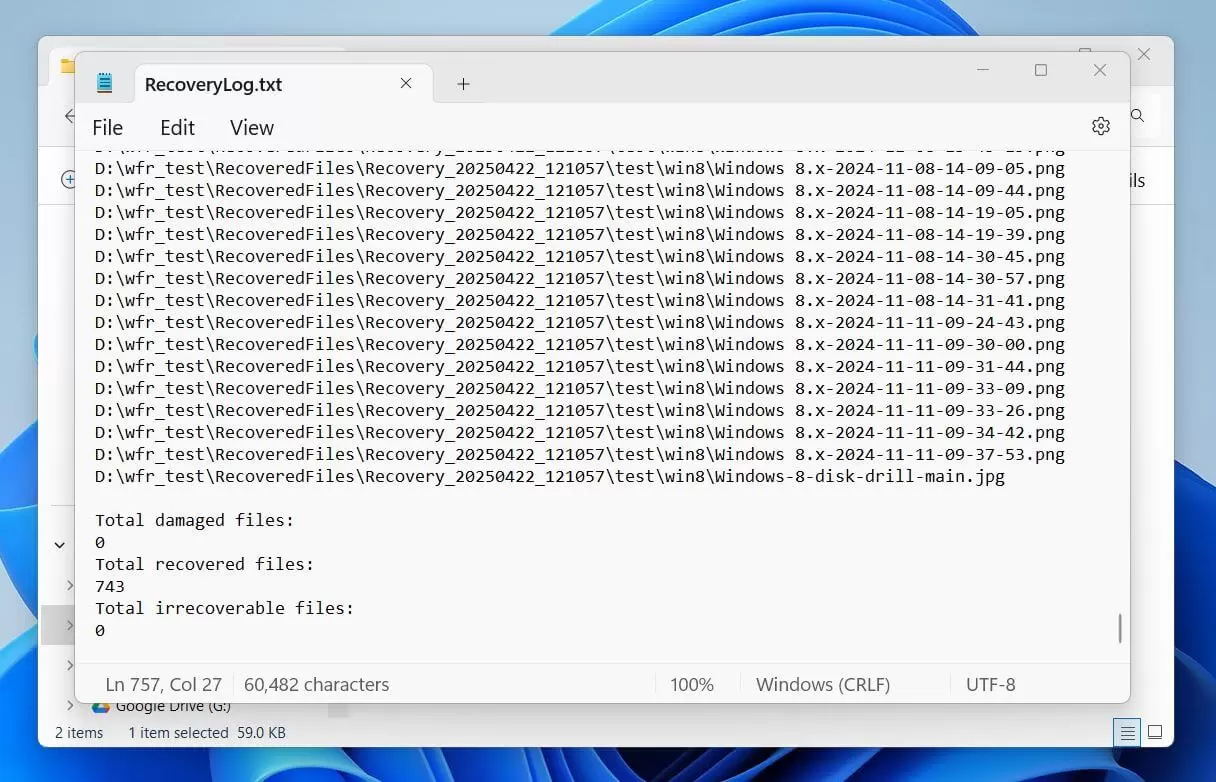
- Open Windows File Recovery and allow the administrator prompt.
- Run a targeted command using the affected drive, destination drive, and thesis filename or document extension.
winfr C: E: /regular /n \Users\YourName\Documents\Thesis.docxReplace the drive letters, username, folder, and filename with the real values. If the targeted regular scan finds nothing, follow Microsoft's documented mode guidance and retry with Extensive mode:
winfr C: E: /extensive /n *.docx /n *.pdf /n *.odt - Enter Y when prompted to begin recovery.
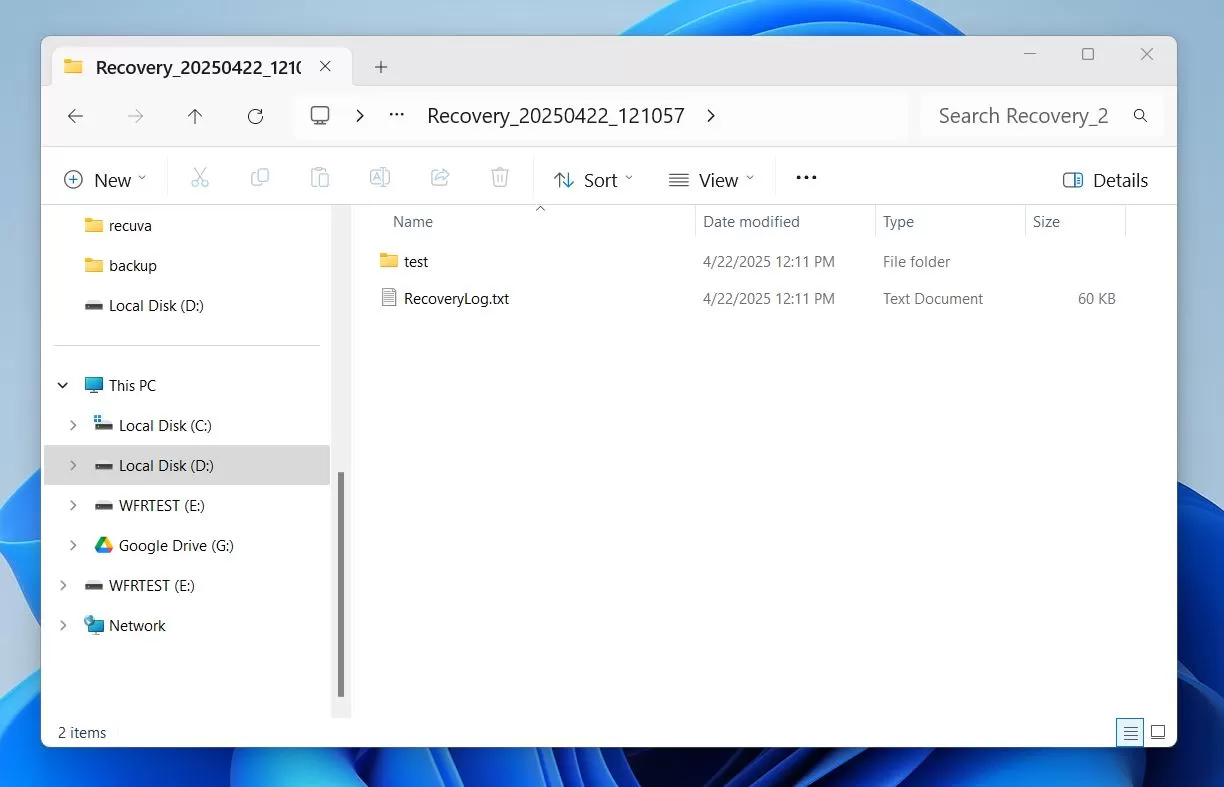
- Inspect the recovery folder created on the destination drive.
Verification: Open each plausible result and inspect the body text, citations, tables, and embedded figures. Recovered filenames or folder paths may differ from the originals.
Method 4: Recover a Deleted Thesis with Fionn Data Recovery
When to use: This is a practical, guided option after the Recycle Bin and backups fail. It supports document recovery from local disks, external hard drives, USB drives, SD cards, and camera storage cards on Windows. Scans run locally in read-only mode, and files are not uploaded.
- Launch Fionn Data Recovery and select the recovery option for the type of data or storage location you want to recover.
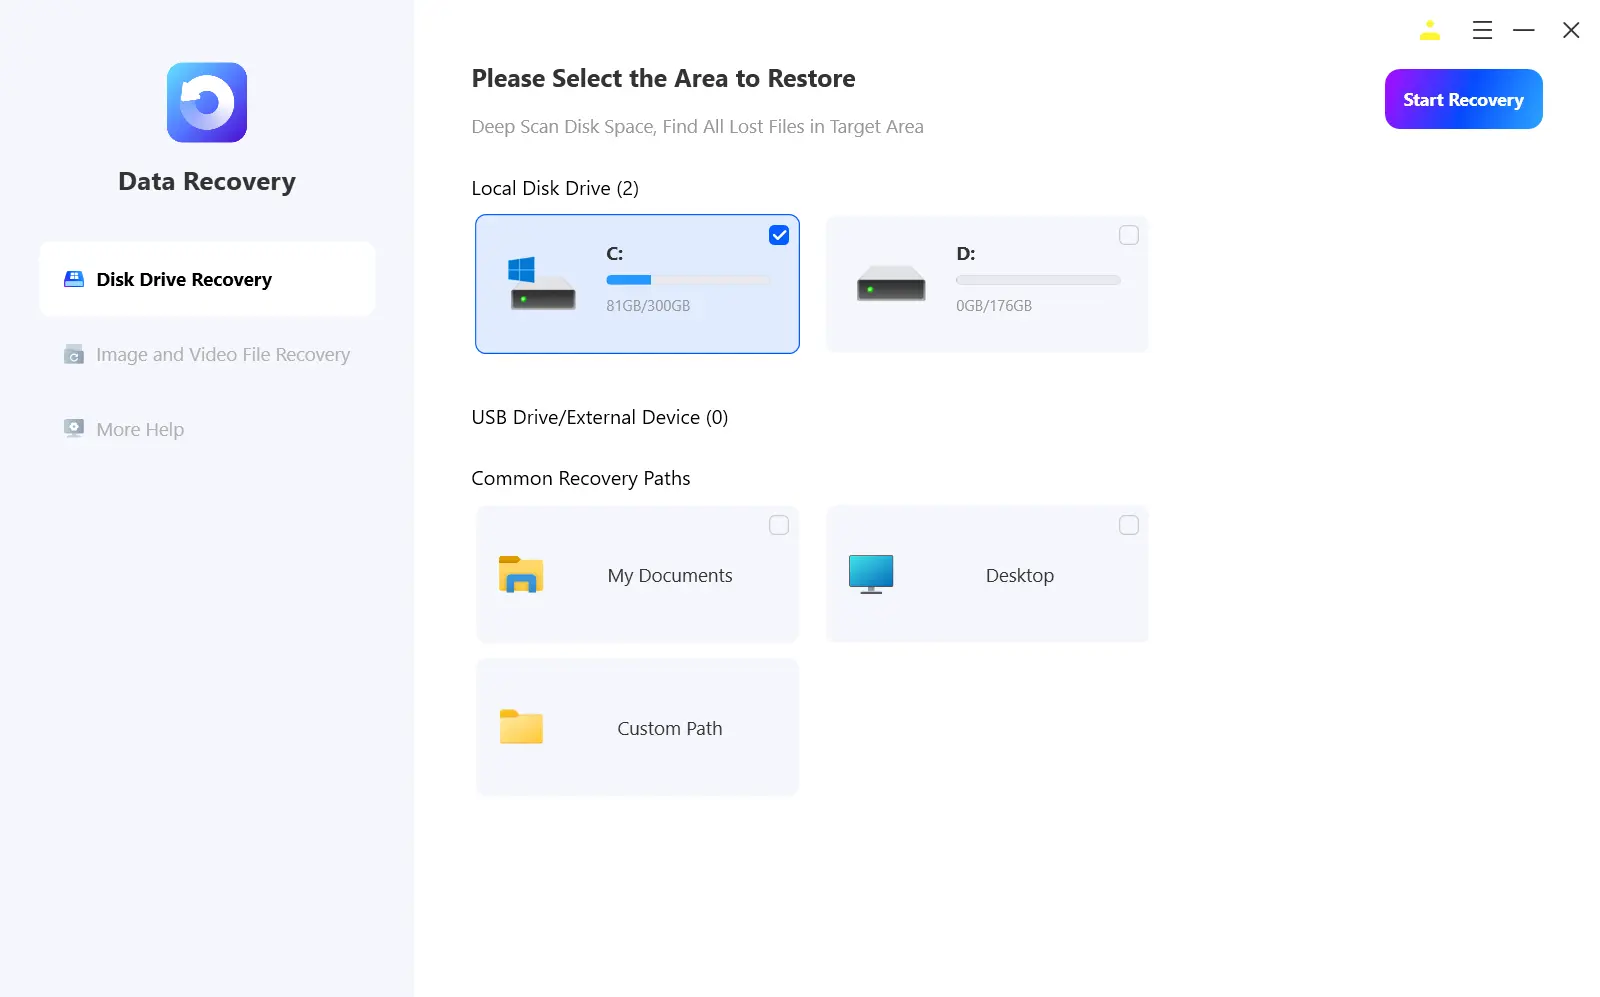
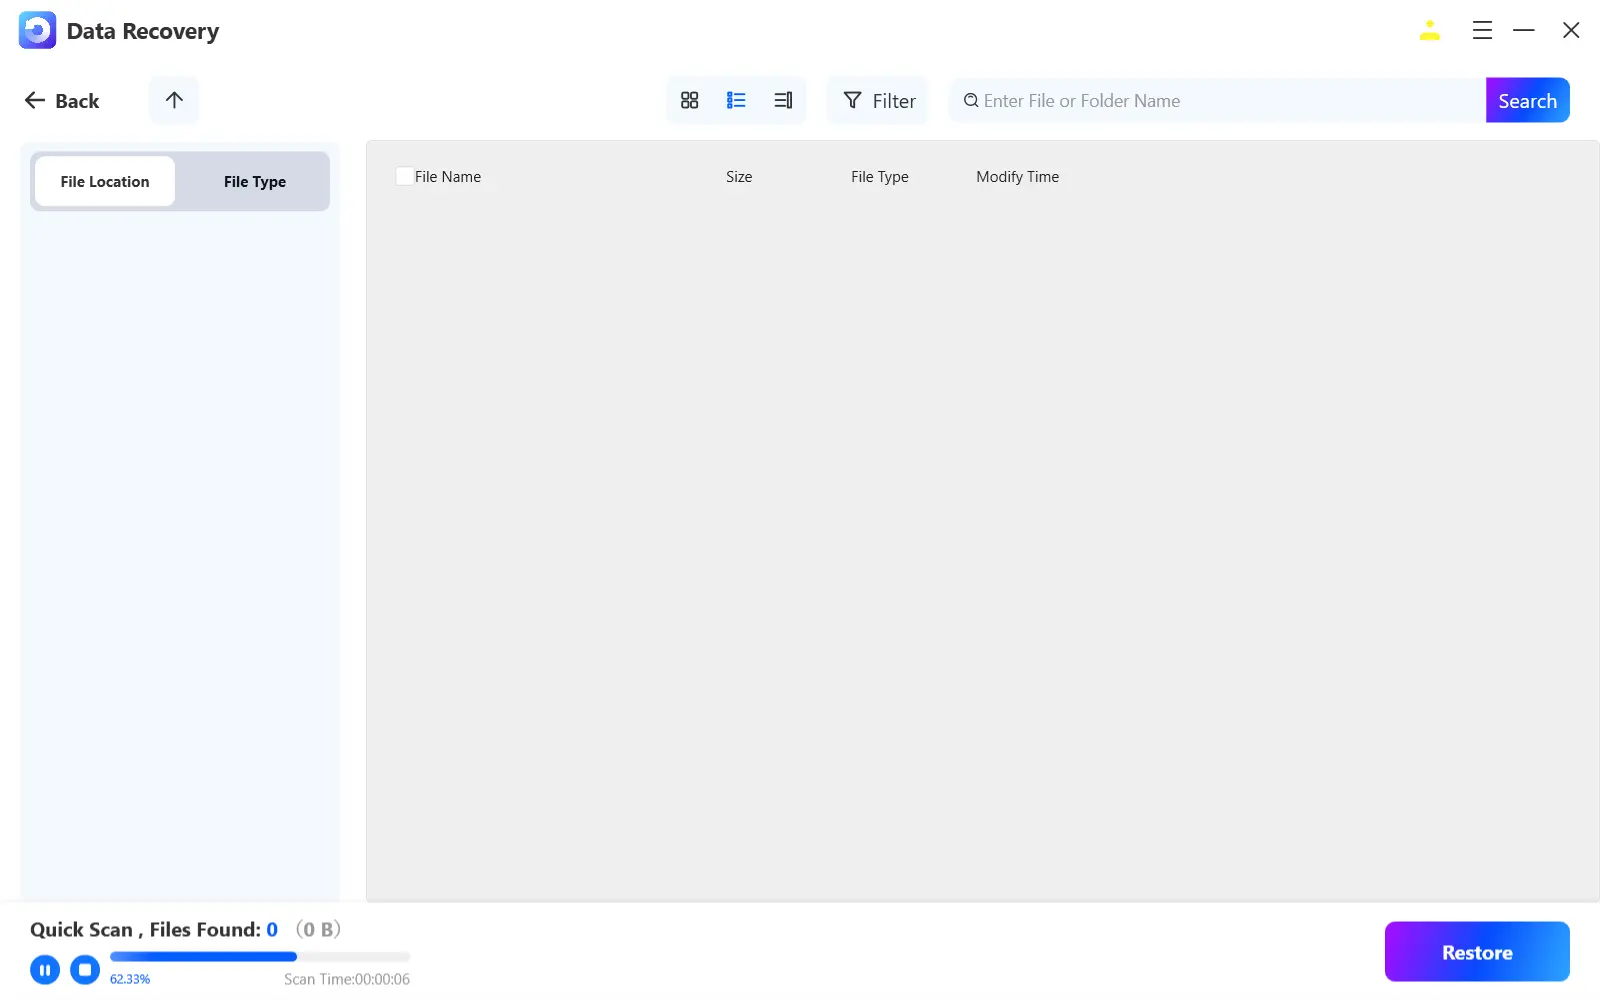
- Start the automatic scan and wait while Fionn Data Recovery searches the selected location for deleted or lost files.
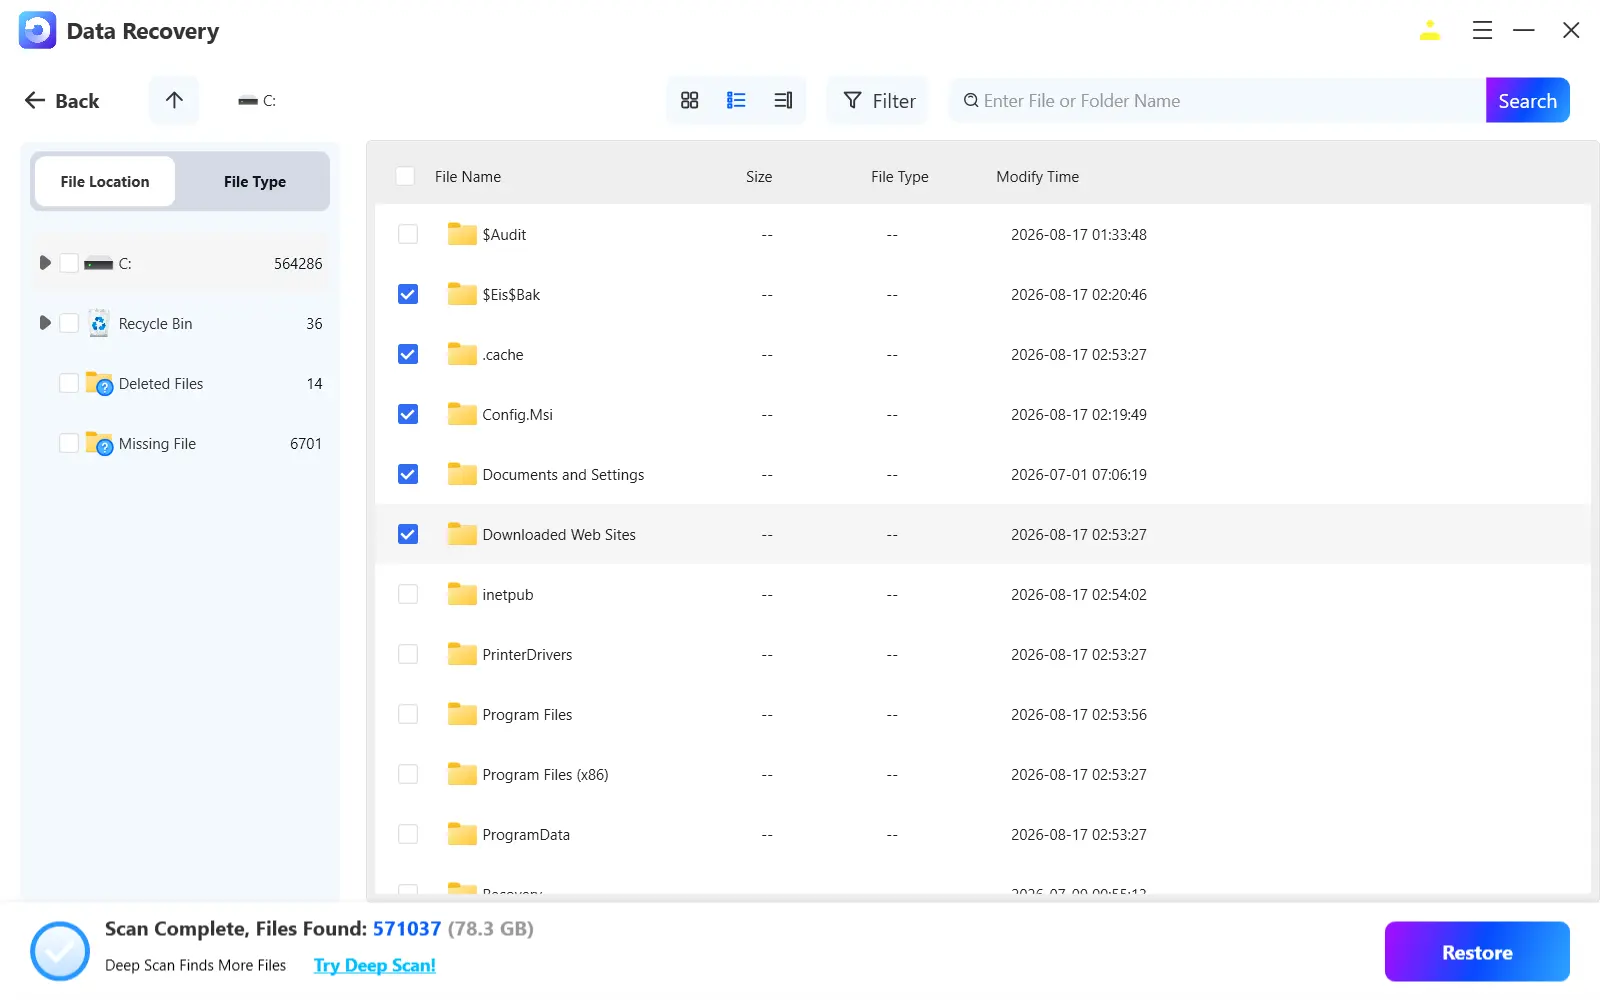
- After the scan finishes, browse the results and preview the files to select the data you want to restore.
- Select a destination folder to save the recovered files, then start the recovery process.
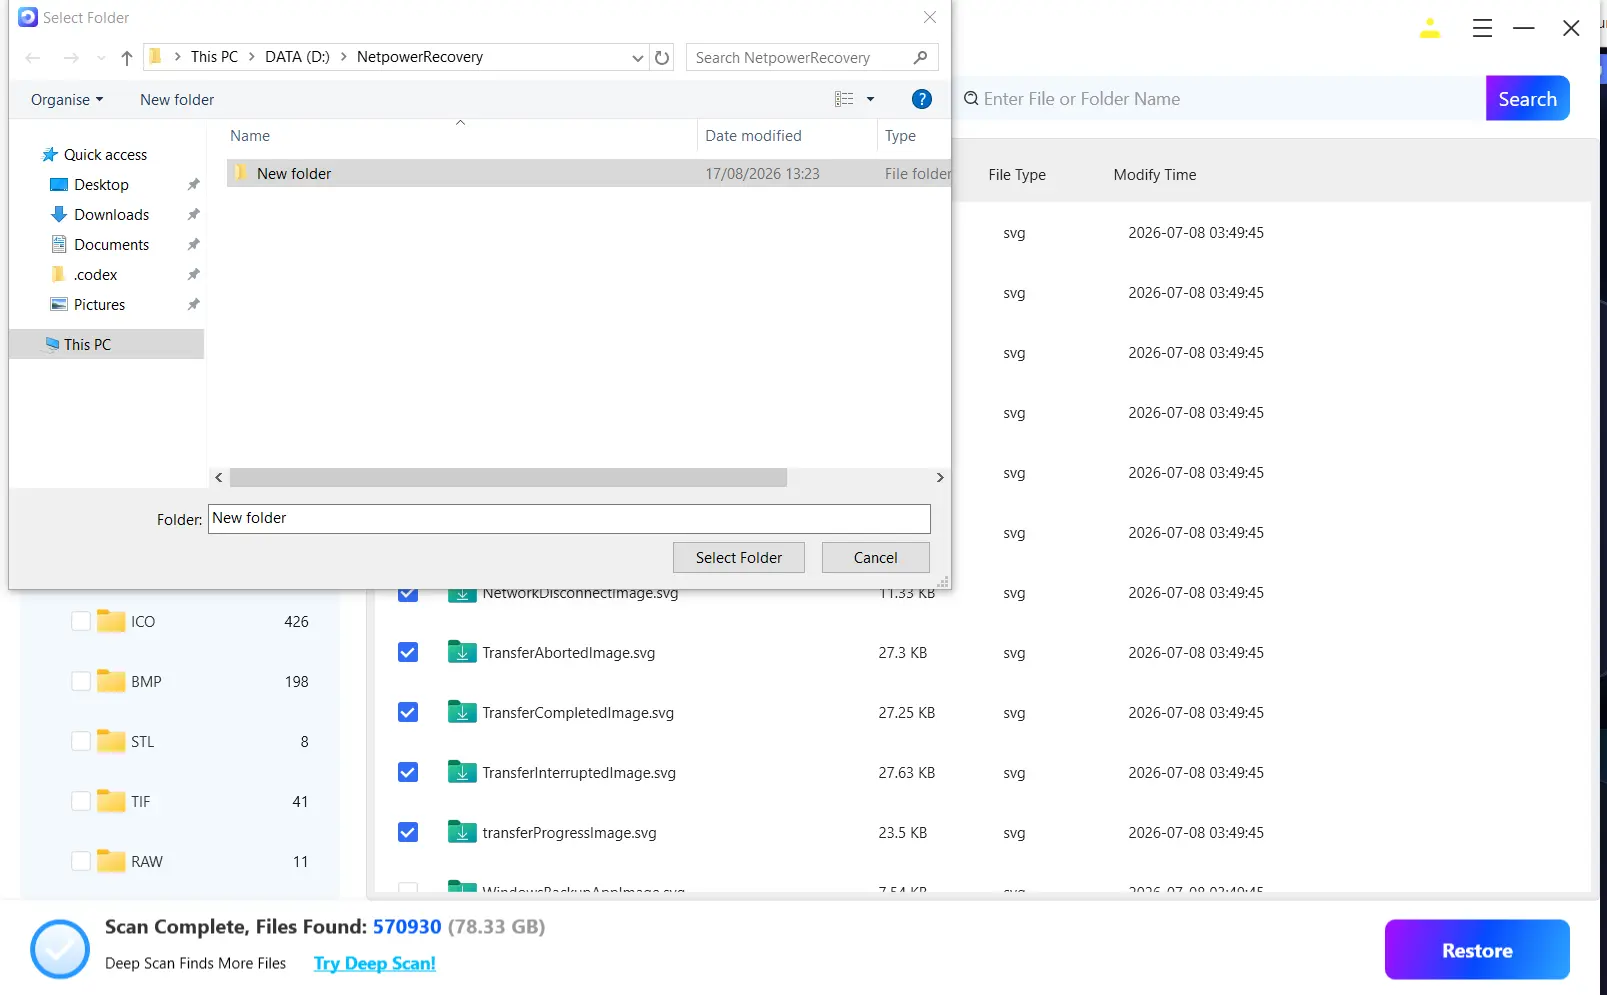
Verification: Open the recovered thesis from the destination folder. Confirm that the previewed content, page structure, references, and attachments survived recovery.
Search and filtering by filename, location, type, time, and size can reduce the results. If a quick scan does not locate the thesis, deep or RAW scanning can search more broadly, including by file signature.
How to Verify the Recovered Thesis
A file's presence alone does not prove that the thesis is intact. Save a duplicate before editing, then verify the title page, table of contents, chapter endings, references, footnotes, tables, and figures. Search for a distinctive sentence from your latest draft. If the document opens with errors or contains missing sections, preserve it and compare other recovered copies.
Check related materials separately. Research data, citation libraries, images, and appendices may have been stored outside the main thesis folder. Recovering the document does not automatically restore those linked files.
Conclusion
Start with the Recycle Bin, followed by OneDrive or File History, because those sources may contain a known copy. Use Windows File Recovery when you are comfortable with commands and have a separate destination drive. For a guided scan with filtering and preview, Fionn Data Recovery can help locate a deleted document. Whichever method succeeds, open the thesis and inspect its chapters, citations, figures, and file size. If no valid copy appears, stop using the affected storage device and consider a professional recovery service.
Frequently Asked Questions
Can I recover a thesis after emptying the Recycle Bin?
Possibly. Check OneDrive, File History, institutional storage, email attachments, and submitted drafts first. If none contains the thesis, scan the affected drive. Recovery depends on whether the file's storage space has been reused, so stop writing to that drive promptly.
What if my thesis exists but the latest chapters are missing?
That is usually a version problem rather than file deletion. Check OneDrive version history, File History, Word's Document Recovery pane, and Recover Unsaved Documents. Preserve the current file before restoring or comparing an older version.
Can System Restore recover a deleted thesis?
No. Microsoft states that System Restore rolls back system files and settings, not personal files. Use the Recycle Bin, a synchronized or backed-up copy, File History, or file-recovery scanning instead.
Should I recover the thesis to its original drive?
No. Saving results to the source drive can overwrite data belonging to the deleted thesis or related files. Choose another internal disk or removable drive, verify the recovered document there, and copy it elsewhere only after validation.
Why does the recovered thesis have a different filename?
Storage-level recovery may locate document content without preserving every original filename or folder record. Filter by document type and size, then open plausible results. Search inside each document for distinctive thesis phrases, chapter titles, or cited author names.
Next Step
If ordinary restoration does not find the thesis, begin a targeted scan while the affected drive remains unused. Keep every recovered candidate until you have confirmed a complete, readable copy.


