 Emily CarterData Recovery
Introduction
To recover files after formatting, stop using the affected drive immediately. First, restore an existing backup. If no backup exists, scan the drive and save recovered files elsewhere. This guide covers three methods in that order: Windows File History, Microsoft’s command-line recovery utility, and Fionn Data Recovery . Recovery may be possible when the old data has not been overwritten, but no method can promise that every file will remain intact.
Before You Start: Protect Recoverable Data
Formatting replaces or rebuilds file-system information, making old files inaccessible through File Explorer. Subsequent activity can reuse the space containing those files. Microsoft therefore advises minimizing computer use during recovery.
- Stop copying, downloading, or editing files on the affected drive.
- Do not format the drive again or create a new partition.
- Do not install recovery software on the affected drive.
- Prepare a separate drive with enough free space for recovered files.
- If an external device disconnects repeatedly or shows physical damage, stop software recovery and seek professional assessment.
A quick format and a full overwrite are different situations. A scan can sometimes locate remnants left after a quick format. Recovery becomes far less likely when new data has been written, the device was securely erased, or storage maintenance has already discarded freed blocks on an SSD.
Choose the Right Method
| Method | Best For | Efficiency | User Effort |
|---|---|---|---|
| File History | A backup created before formatting | High when a usable backup exists | Low |
| Windows File Recovery | No backup and comfort with commands | Targeted but potentially slow | Moderate |
| Fionn Data Recovery | A guided scan of a formatted local drive, USB drive, or memory card | Quick, deep, and RAW scan options | Low |
Check backups first because they do not require scanning the formatted media. Without a backup, choose Windows File Recovery for a free Microsoft command-line approach. Fionn Data Recovery is the recommended guided option when you want searchable scan results and file previews before recovery.
Method 1: Restore Files from a File History Backup
When to use: Use this method only if File History saved the missing folder to another drive or network location before formatting.
- Connect the external drive or network location containing the File History backup.
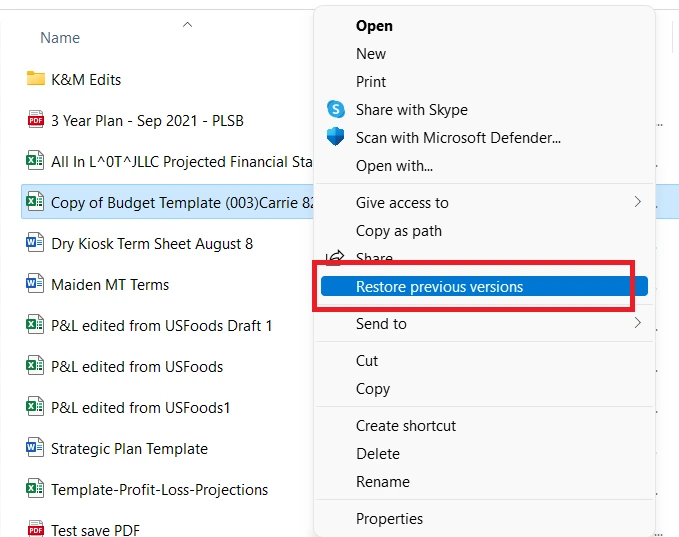
- Open File Explorer and navigate to the folder that previously contained the missing files.
- Right-click the folder and select Restore previous versions .
- Select a version dated before the format, then open it to confirm that the required files are present.
- Expand Restore , choose Restore to , and select a safe destination outside the formatted drive.
Open several restored documents, photos, or videos to verify their contents. File History cannot help if it was never enabled or the affected files were outside its protected locations. Microsoft documents these controls in Backup and restore with File History .
Method 2: How to Recover Files After Formatting with Windows File Recovery
When to use: Use Windows File Recovery when no suitable backup exists and the formatted source appears as a local drive with a drive letter. It does not recover from cloud storage or network shares.
- Connect a separate destination drive, then note the source and destination drive letters in File Explorer.
- Install Windows File Recovery from the Microsoft Store and launch it with administrator approval.
- Run Extensive mode, which Microsoft recommends for a formatted disk. For example, to recover JPG and DOCX files from
D:toE:, enter:winfr D: E: /extensive /n *.jpg /n *.docx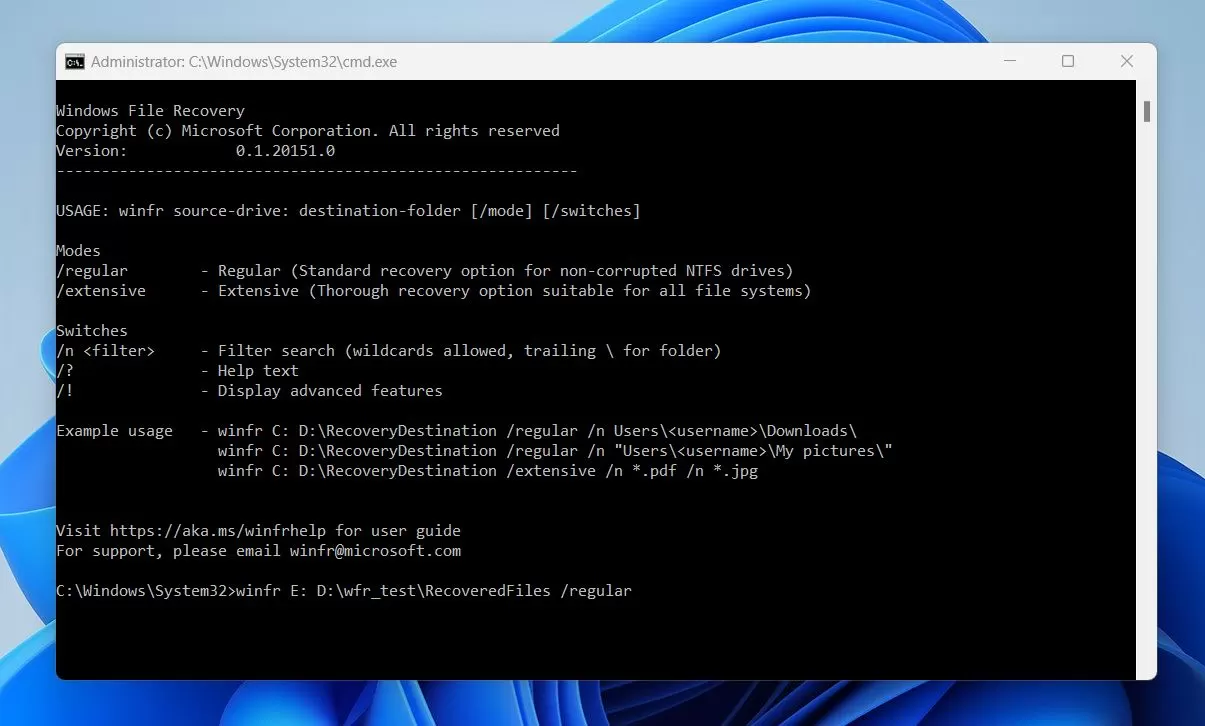
- Enter
Ywhen prompted and let the operation finish. Microsoft creates a destination folder namedRecovery_<date and time>.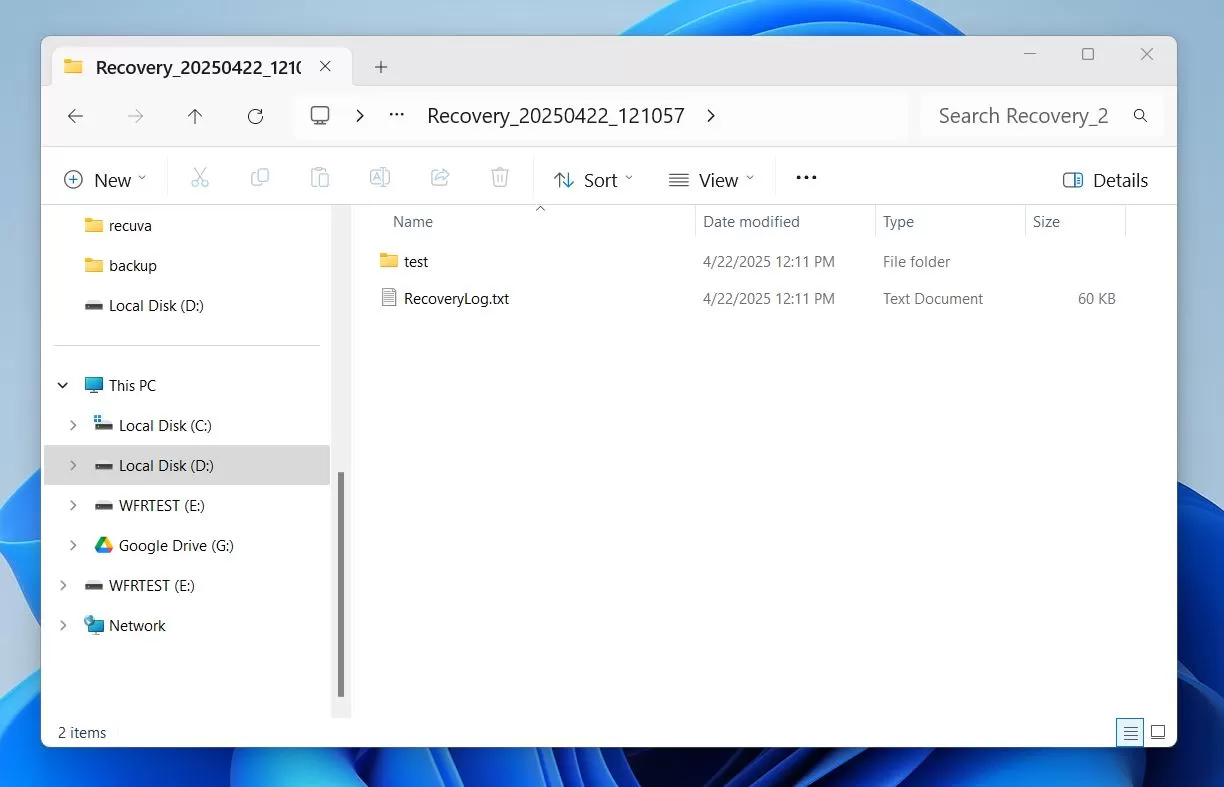
- Inspect the recovered folder and open representative files to confirm that their contents are readable.
This method offers precise filters but requires correct command syntax. Extensive mode may take considerable time on a large drive, and recovered names or folder structures may be incomplete.
Method 3: Fix Formatted-Drive File Loss with Fionn Data Recovery
When to use: Use this Windows desktop method when you need a guided scan of a formatted local disk, external hard drive, USB drive, SD card, or camera memory card. It is a practical option when command-line filters are inconvenient.
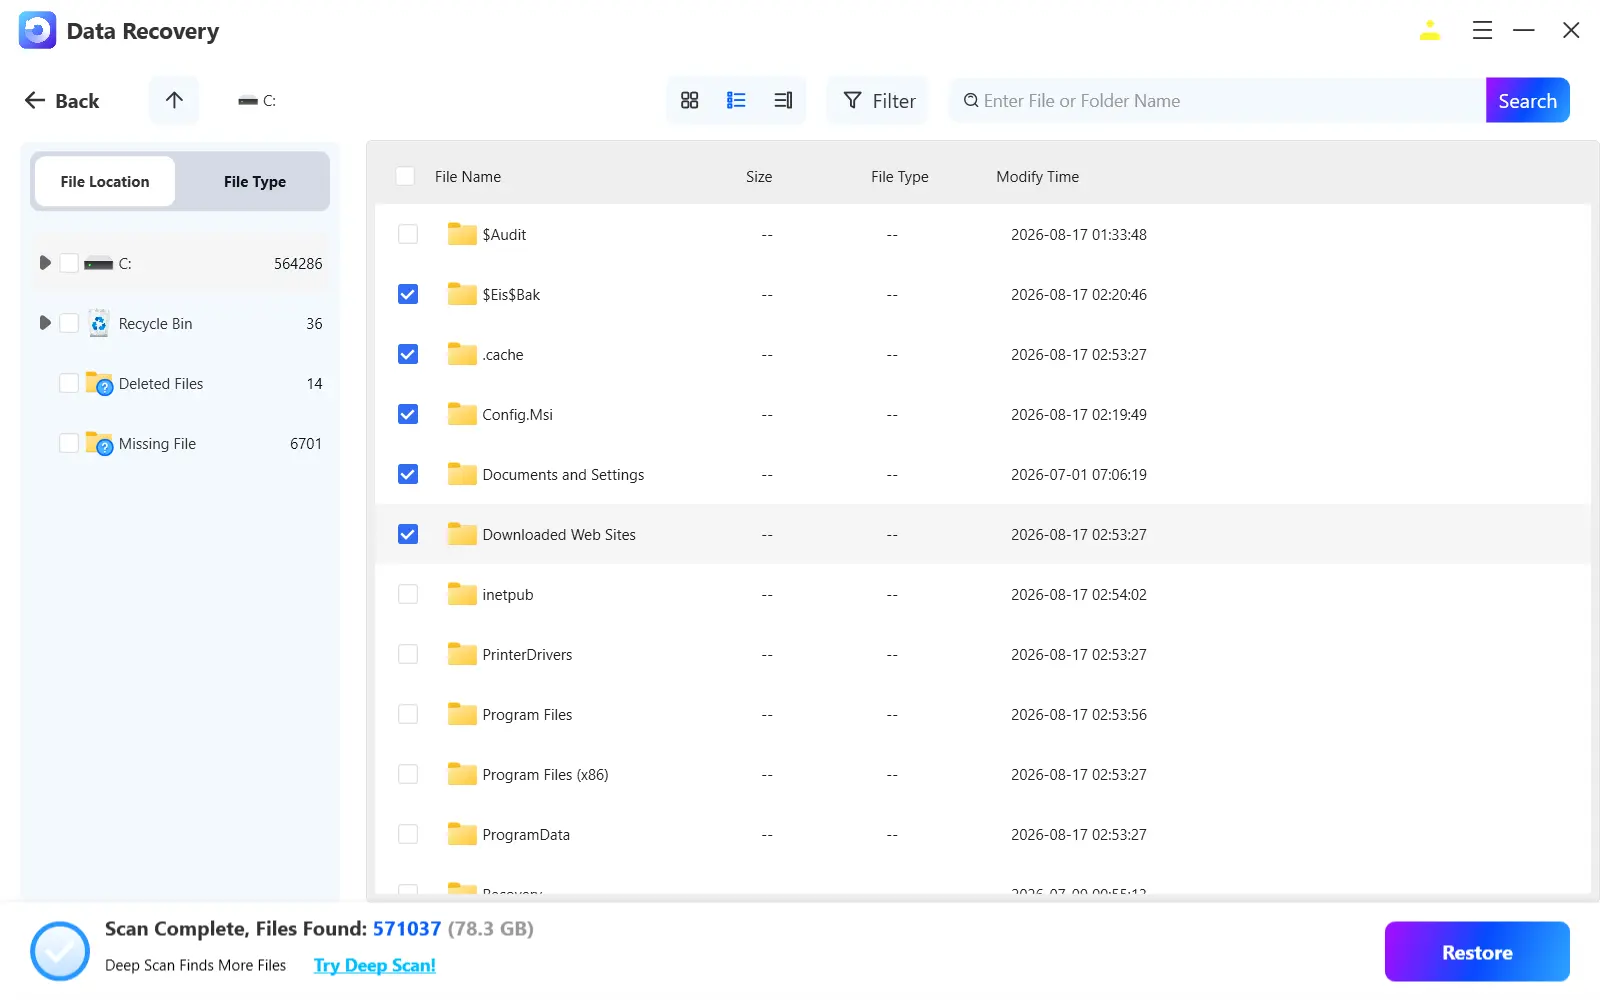
Fionn Data Recovery scans locally in read-only mode and does not upload files. It can search by name, location, type, time, or size. Previewing results helps you judge file content before choosing what to recover.
- Launch Fionn Data Recovery and select the recovery option for the type of data or storage location you want to recover.
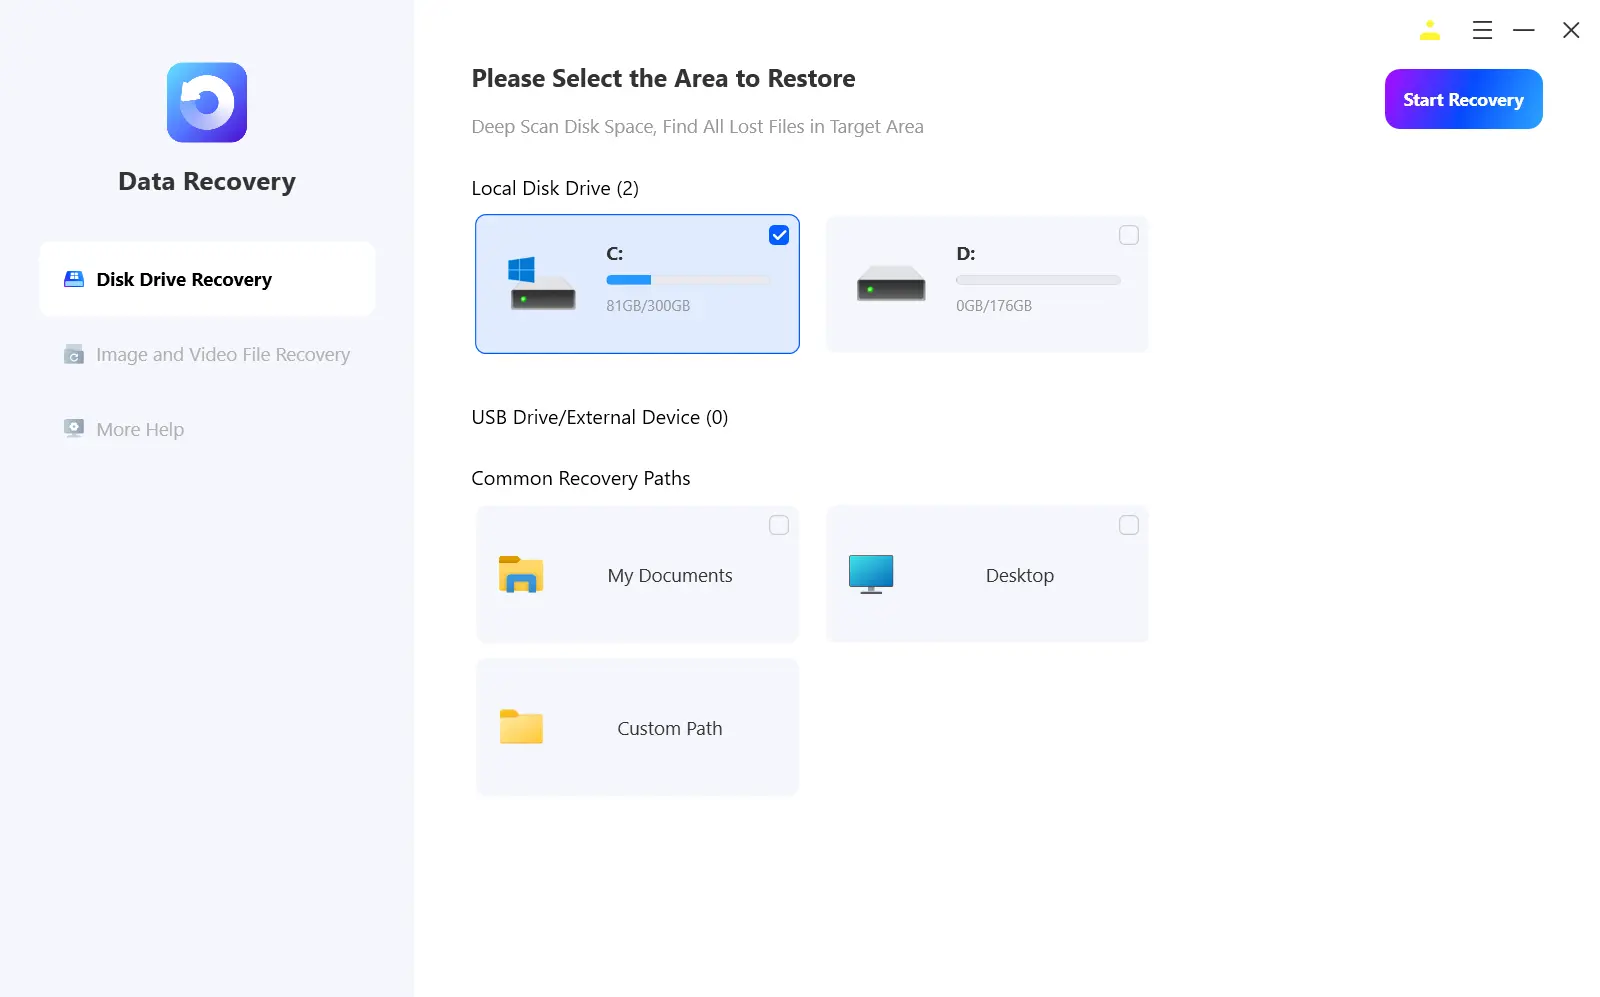
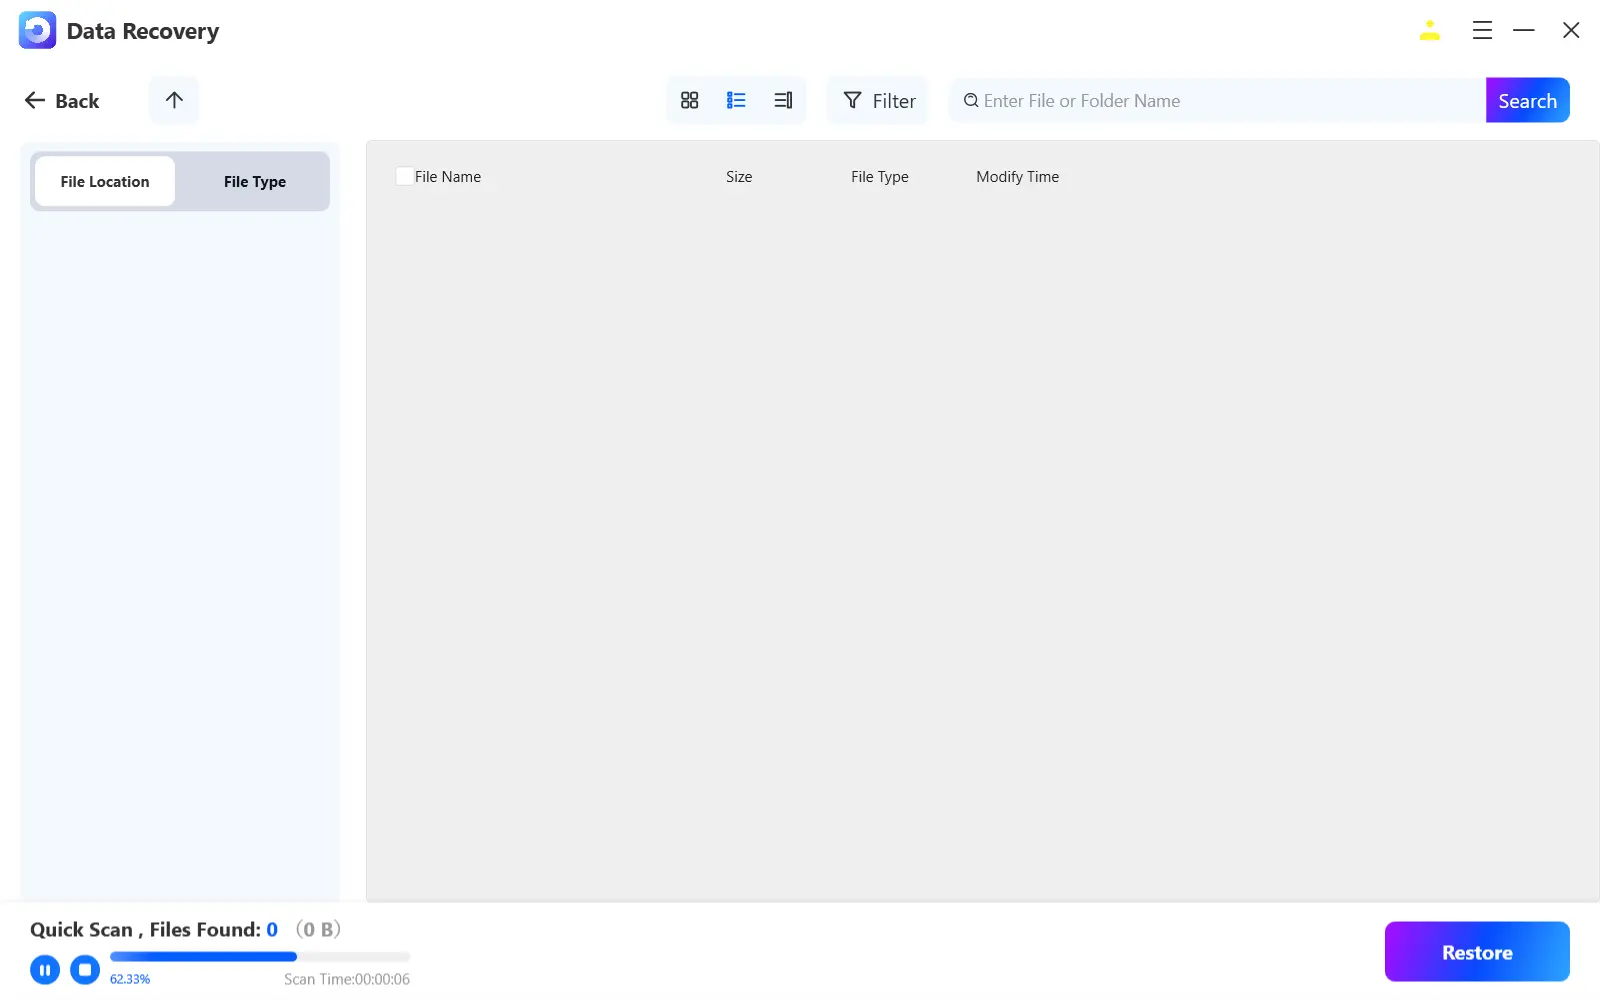
- Start the automatic scan and wait while Fionn Data Recovery searches the selected location for deleted or lost files.
- After the scan finishes, browse the results and preview the files to select the data you want to restore.
- Select a destination folder to save the recovered files, then start the recovery process.
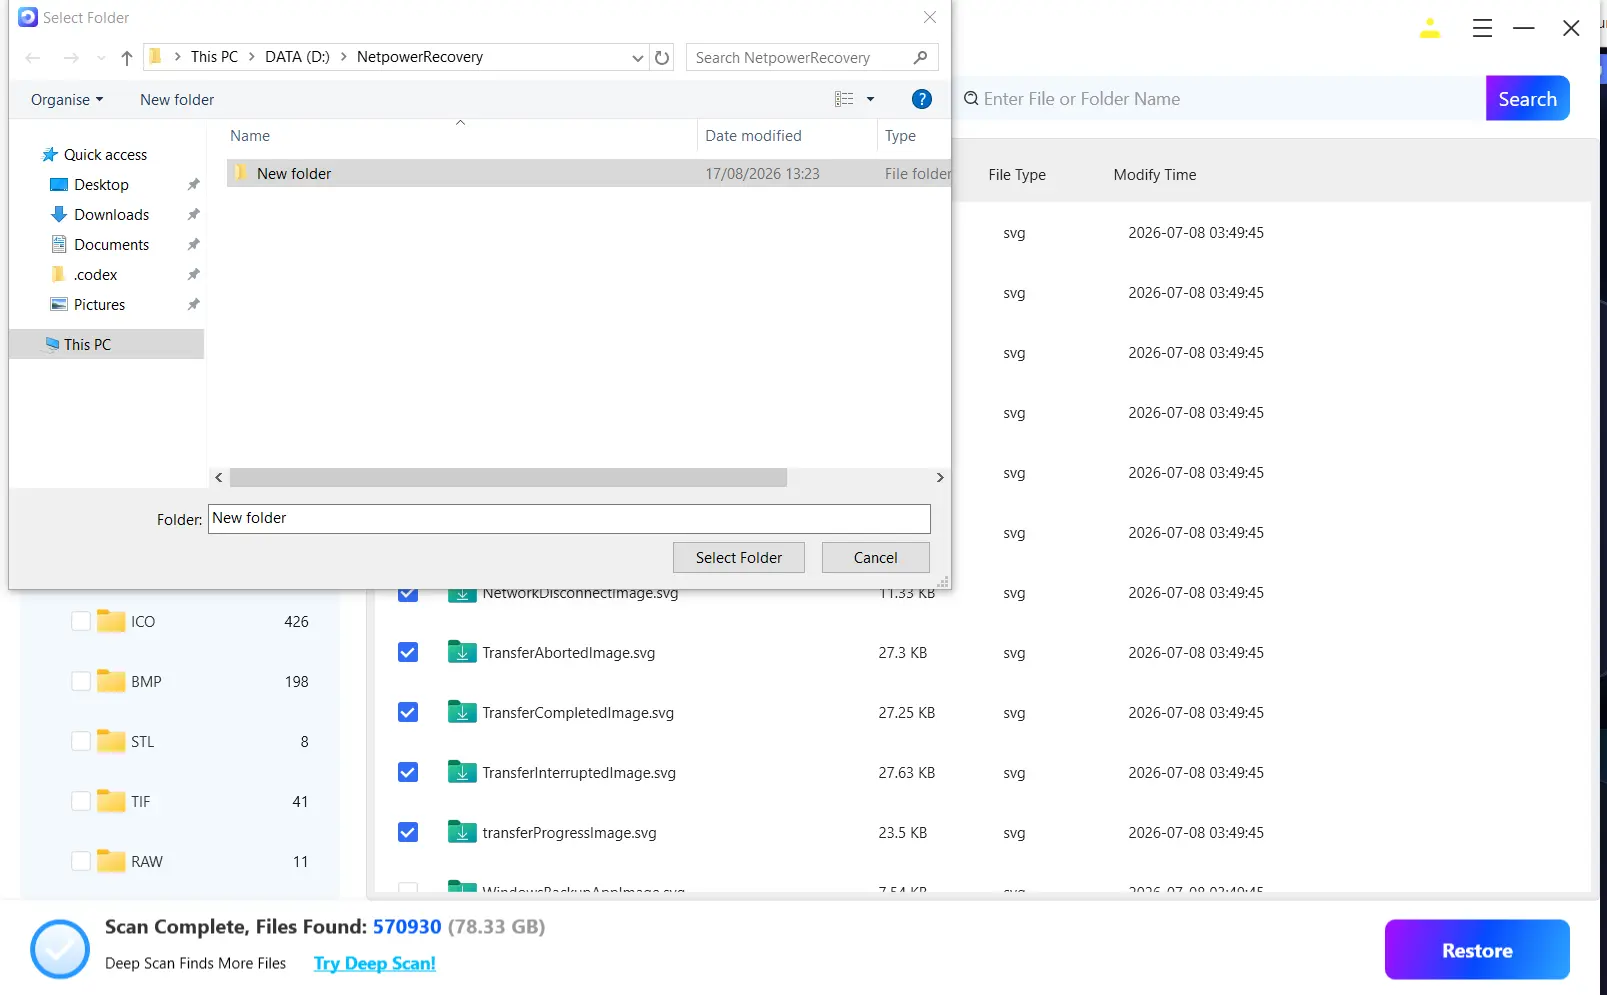
Verify the result by opening files from the destination drive. If targets are absent, the product provides quick, deep, and file-signature-based RAW scanning. Availability of file preview, deep scanning, all file types, unlimited recovery, and dedicated support forms part of its VIP benefits.
Tips for Better Recovery Results
- Prioritize irreplaceable files. Recover essential documents and original photos before replaceable downloads.
- Check content, not only filenames. Formatting can separate file data from original names and folder paths.
- Use a broader scan only when needed. A deeper or signature-based scan may find more content but can take longer and produce less organized results.
- Keep the first recovered copy unchanged. Validate it before renaming, editing, or moving files back to the source.
Conclusion
The best recovery order is backup first, followed by a non-writing scan when no backup exists. Confirm success by opening several recovered files from the separate destination, not merely checking their names. Windows File Recovery suits users comfortable with command syntax, while Fionn Data Recovery provides a guided, preview-based alternative. If repeated scans cannot find critical files, stop using the source and consult a qualified recovery service, especially when the device disconnects, makes unusual sounds, or has physical damage.
Frequently Asked Questions
Can all files be recovered after formatting?
No. Recovery depends on whether the original storage blocks remain readable and unmodified. New writes, secure erasure, physical damage, and SSD storage management can reduce or eliminate recoverability. Treat any recoverable result as uncertain until each file opens correctly.
Should I run CHKDSK on a formatted drive?
Not before recovering important files. CHKDSK repairs file-system structures and can write changes to the volume. Its purpose is file-system repair, not preservation of formatted data. Recover or image critical data first, then address the file system.
Why must recovered files go to another drive?
Saving to the source creates new writes that may reuse space occupied by another missing file. Microsoft’s Windows File Recovery also requires different source and destination drives. Keep recovered output separate until verification is complete.
What if recovered files have different names?
A format can remove metadata that connected file contents to their original names and folders. Signature-based recovery may still recognize a file type while losing that metadata. Sort results by type, size, and date, then use previews or open the files to identify them.
Does a factory reset follow the same recovery process?
Not necessarily. A reset can reinstall Windows and write substantial data to the system drive, increasing overwrite. Stop using the computer, avoid installing recovery tools on that drive, and consider professional help when the missing information is valuable or legally sensitive.


