 Emily CarterDLL Errors
An advapi32.dll error usually means an application cannot load or use a Windows system component it expects. Start by identifying whether the error affects one application or several. Reinstall the single affected app first; if multiple programs fail, check Windows system files with SFC and DISM. This guide covers four repair paths, including a guided scan-and-repair option, then shows how to verify the result. Avoid downloading a standalone DLL from an unverified website, because it may not match your Windows installation.
Quick Method Comparison
| Method | Best For | Efficiency | User Effort |
|---|---|---|---|
| Repair or reinstall the app | Only one app shows the error | High for app-specific damage | Moderate |
| System File Checker | Multiple apps fail or Windows files may be damaged | High for protected system files | Low |
| DISM component repair | SFC cannot repair all files | High for the Windows component store | Moderate |
| Fionn DLL Fixer | A guided scan of DLL and system issues is preferred | Automated workflow | Low |
Method 1: Repair or Reinstall the Affected App
When to use: The message appears only when opening one program or game, while other Windows applications work normally. This path targets the application installation rather than changing Windows system files.
- Close the application and restart Windows to clear any locked program files.
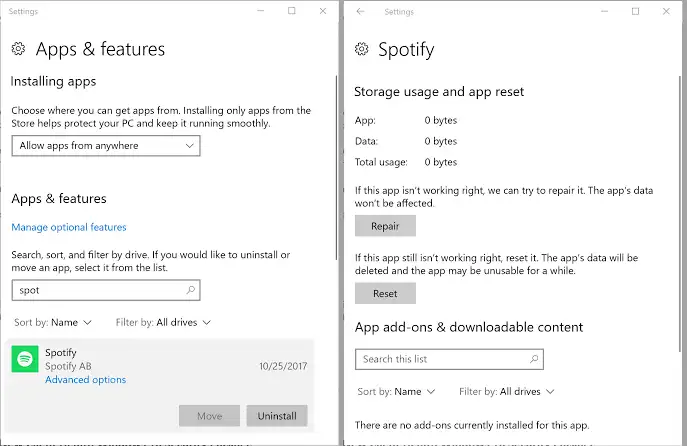
- Open Settings > Apps > Installed apps , find the affected application, and check whether its menu offers Repair .
- Run the app's repair option if it is available.
- If there is no repair option or the error continues, uninstall the application from Installed apps.
- Install a fresh copy from the application's official publisher or store source.
- Open the application and repeat the action that previously triggered the error.
Verification: The program opens and completes the previously failing task without displaying the advapi32.dll message.
Method 2: Run System File Checker for an advapi32.dll Error
When to use: More than one application reports DLL-related failures, the problem began after an interrupted update or shutdown, or reinstalling one app did not help. System File Checker checks protected Windows system files and repairs files it can restore.
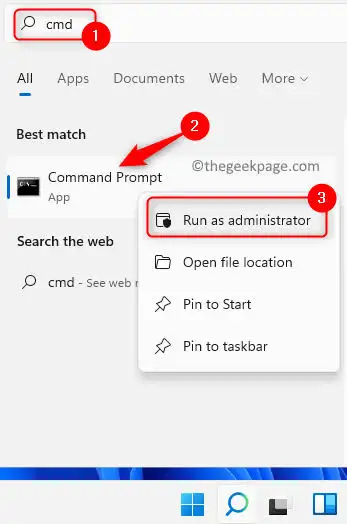
- Search for Command Prompt from Start.
- Select
Run as administrator
.
- Enter the following command and press Enter:
sfc /scannow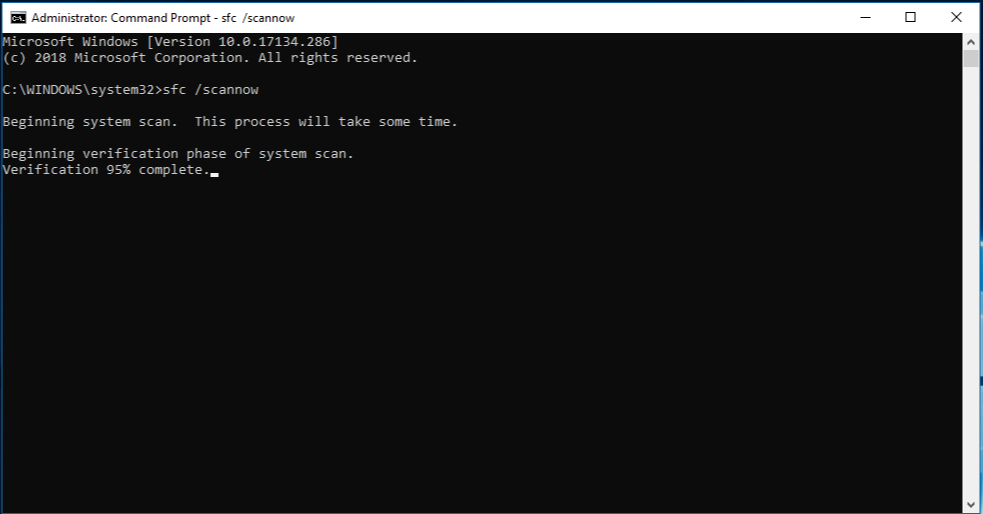
- Keep the command window open until the verification reaches 100%.
- Restart Windows after the scan completes.
Microsoft documents the SFC command and its result messages in its System File Checker repair instructions .
Verification: If SFC reports that it found and repaired corrupt files, restart and test the affected application. If it reports that some files could not be fixed, use Method 3.
Method 3: Repair the Windows Component Store with DISM
When to use: SFC reports unrepaired files, or the same problem affects several applications after Windows maintenance. DISM can repair the Windows component store that SFC uses as a repair source.
- Open Command Prompt as an administrator.
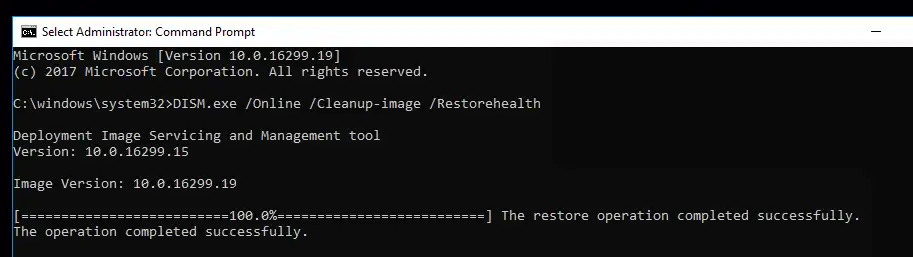
- Run this command:
DISM /Online /Cleanup-Image /RestoreHealth - Wait for DISM to finish; do not close the window while it is running.
- Run
sfc /scannowagain after DISM completes. - Restart Windows and test the affected application.
Microsoft's Windows image repair documentation explains the DISM repair sequence.
Verification: The follow-up SFC scan completes without unrepaired-file results, and the original application no longer produces the error.
Method 4: Fix an advapi32.dll Error with Fionn DLL Fixer
When to use: You want a guided scan for detected DLL and system issues, especially when the cause is unclear. Fionn DLL Fixer is a practical option because its documented workflow scans for DLL and system issues, repairs detected issues, and supports a follow-up check.
- Launch Fionn DLL Fixer. The software automatically scans your PC for DLL and system issues and displays the detected results when the scan is complete.
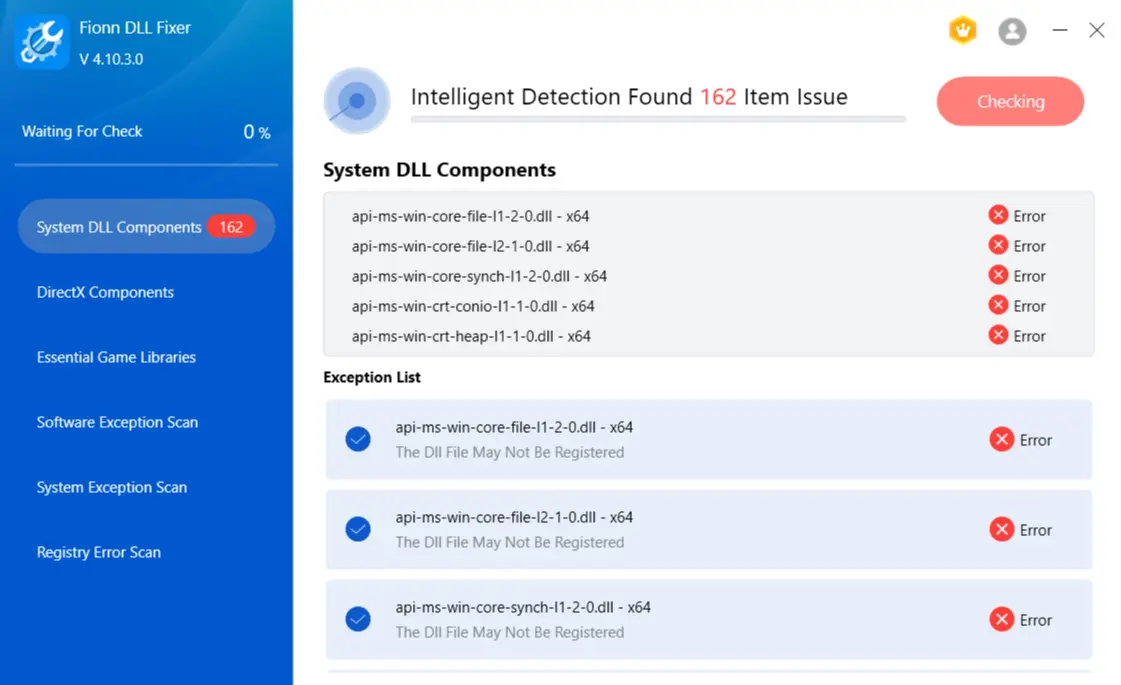
- After the scan finishes, click “Repair” to start fixing all detected DLL and system issues automatically.
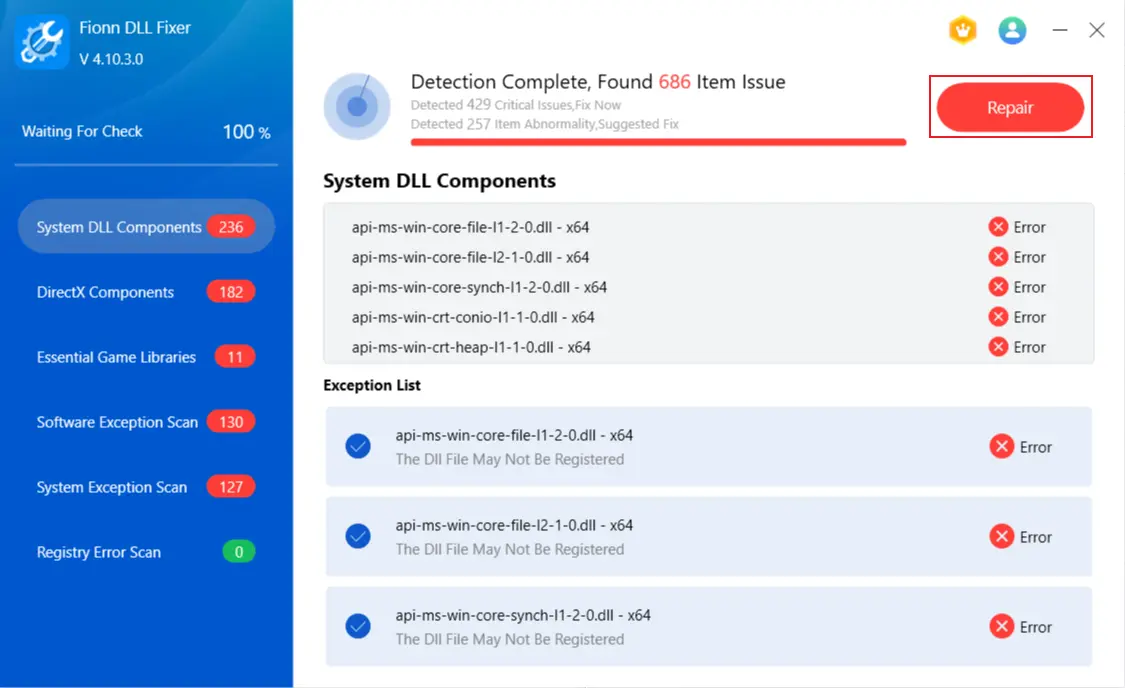
- Wait while the repair is in progress. During this process, the button changes to “Fixing” until all issues have been repaired.
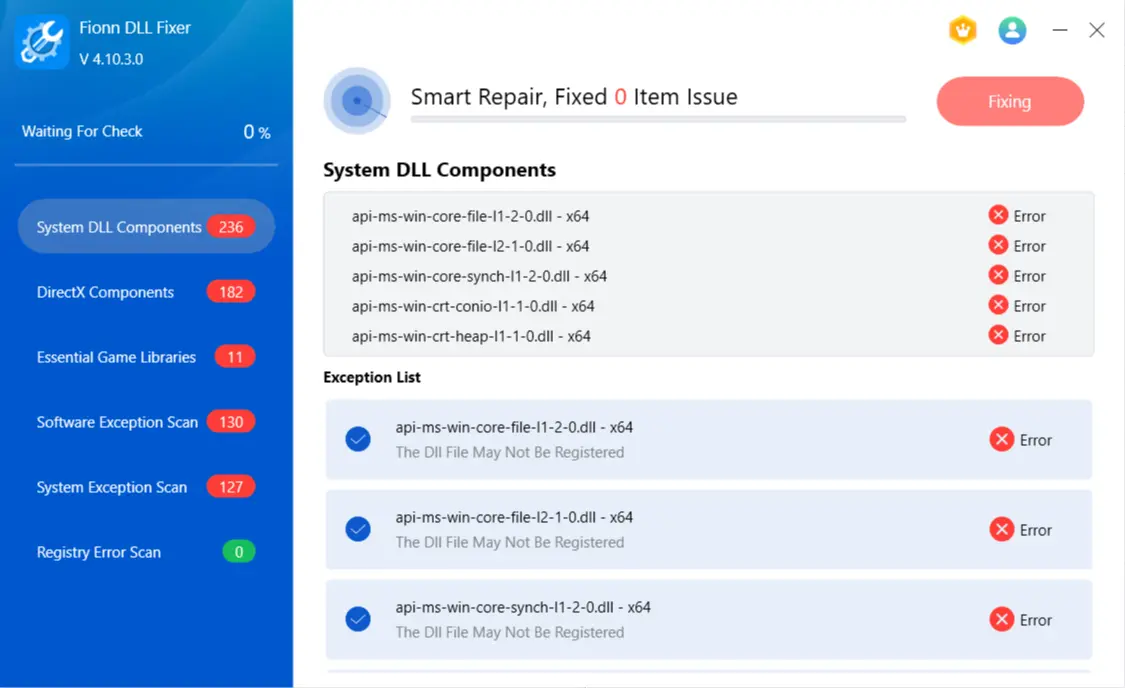
- When the repair is complete, click “Ok” in the confirmation dialog. If prompted, restart your computer before checking whether the problem has been resolved.
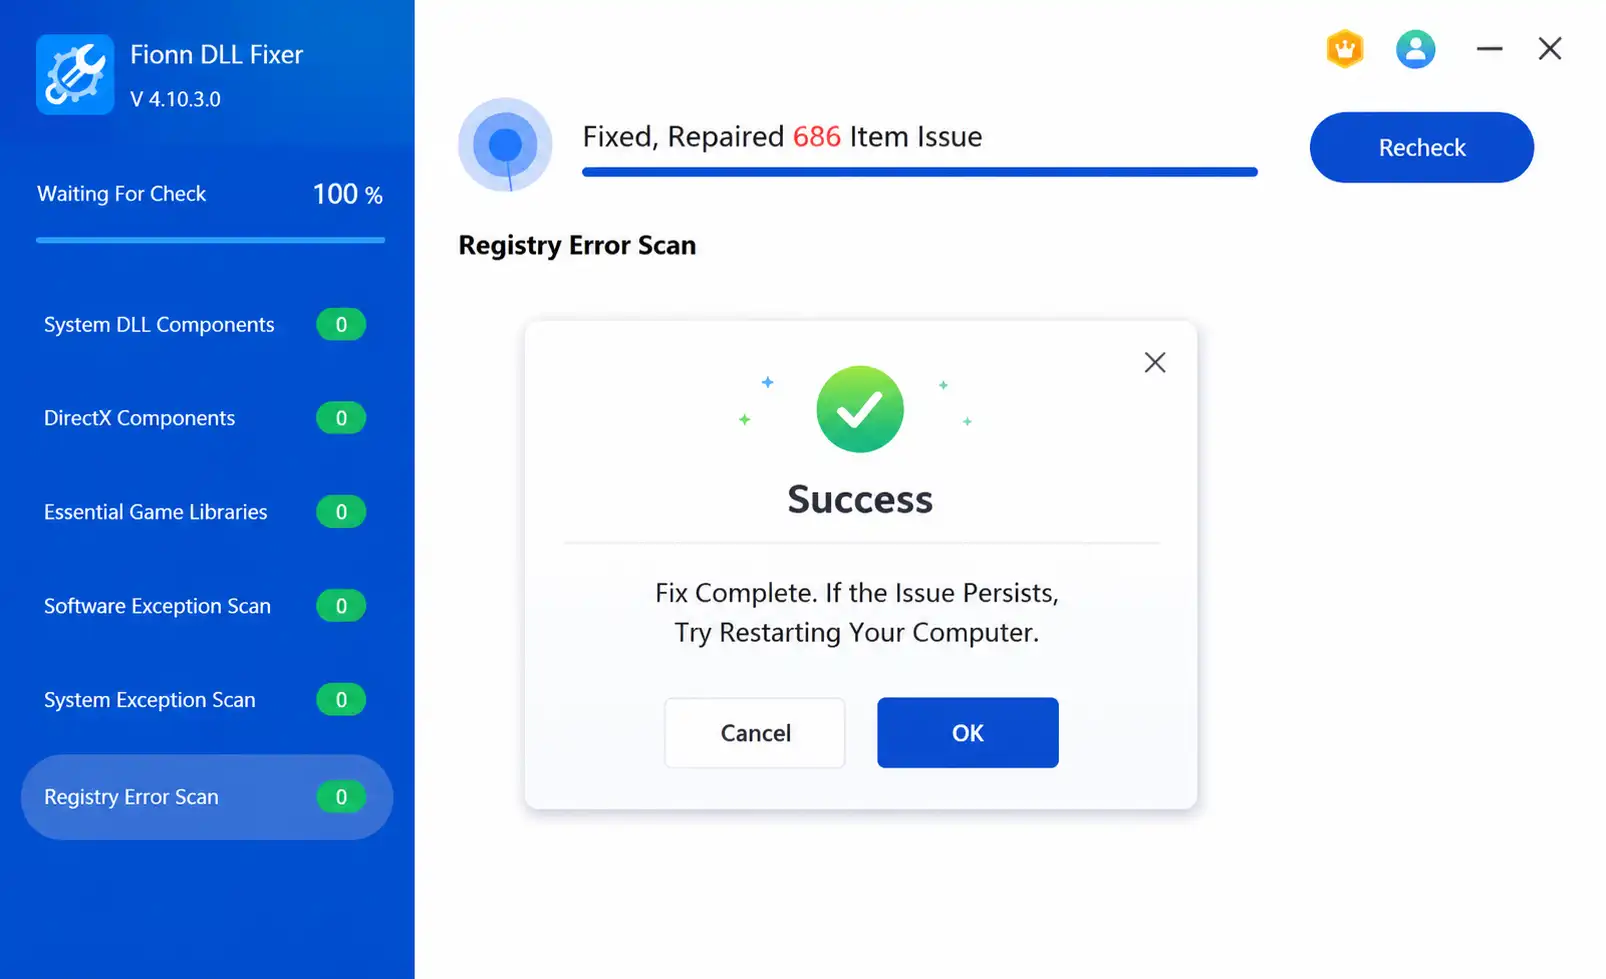
- If the issue still persists after restarting, click “Recheck” to perform another scan. If new issues are found, click “Repair” again to fix them.
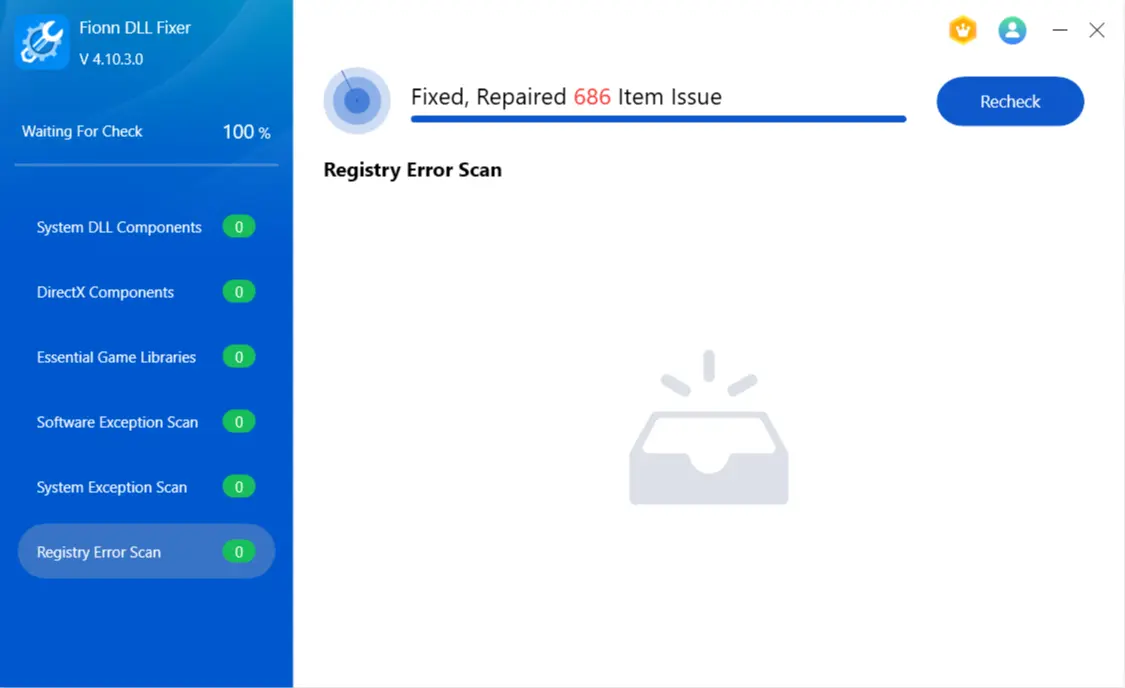
Verification: After any requested restart, open the affected application and repeat the action that produced the error. A clean recheck and a successful launch are useful separate checks.
Conclusion
For an advapi32.dll error in one program, repair or reinstall that program first. If several applications fail, run SFC; use DISM followed by SFC when Windows reports files it could not repair. If you prefer a guided diagnostic and repair flow, Fionn DLL Fixer can scan, repair, and recheck detected DLL and system issues. Verify every path by restarting when requested and repeating the exact task that caused the error. If the message remains tied to one application, the next practical step is the publisher's support channel.
Frequently Asked Questions
What does an advapi32.dll error mean?
It means an application reported a problem loading or using the Windows file named
advapi32.dll
. The underlying cause may be limited to that app's installation or involve damaged Windows system files.
Should I download advapi32.dll separately?
No. A standalone file may be the wrong version or architecture for your Windows installation. Use the app's official installer, SFC, or DISM instead.
Should I run SFC or DISM first?
Run SFC first. If it cannot repair all protected system files, run DISM, then run SFC again.
Why does the error affect only one application?
That pattern often points to the application's own files or configuration. Repairing or reinstalling the affected application is the least broad repair path to try first.
How do I know the fix worked?
Restart if prompted, launch the affected application, and repeat the task that triggered the message. A repair is confirmed only when that task completes without the error.


