 Emily CarterScreen Recording
If you need to know how to record screen without Xbox Game Bar , use a recorder that matches the clip you need. On Windows 11, Snipping Tool is the fastest choice for a short selected-area recording. For configurable screen, window, or region capture with sound options, Fionn Screen Recorder is the recommended option. OBS Studio is a practical alternative when you need scenes or more detailed source control. This guide covers three distinct methods, starting with the lightest built-in path.
How to Record Screen Without Xbox Game Bar: Quick Method Comparison
| Method | Best For | Efficiency | User Effort |
|---|---|---|---|
| Snipping Tool | A short, selected-area video on Windows 11 | High | Low |
| Fionn Screen Recorder | Screen, window, or region capture with selectable sound | High | Low to medium |
| OBS Studio | Scenes, multiple sources, or more recording control | Medium | Medium |
Method 1: Record a Selected Area with Snipping Tool
When to use: Choose this built-in Windows 11 method when you only need a quick visual clip and can select the portion of the screen to capture.
- Open Snipping Tool, select
Record
, and choose
New
; alternatively, press
Windows logo key + Shift + R.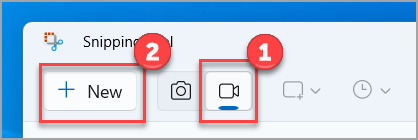
- Drag to select the area you want to capture.
- Select Start to begin the recording.
- Select Stop when finished, then save the video from Snipping Tool.
Verify: Play the saved clip and confirm that the selected area begins and ends where expected. Microsoft’s Snipping Tool recording instructions also describe the Record, New, Start, and Stop controls.
Method 2: Fix screen recording needs with Fionn Screen Recorder
When to use: Use this recommended method when you want to choose a full screen, window, or region and explicitly set the sound source before recording. It is useful for tutorials, demonstrations, and meeting notes where capture scope and audio should be checked upfront.
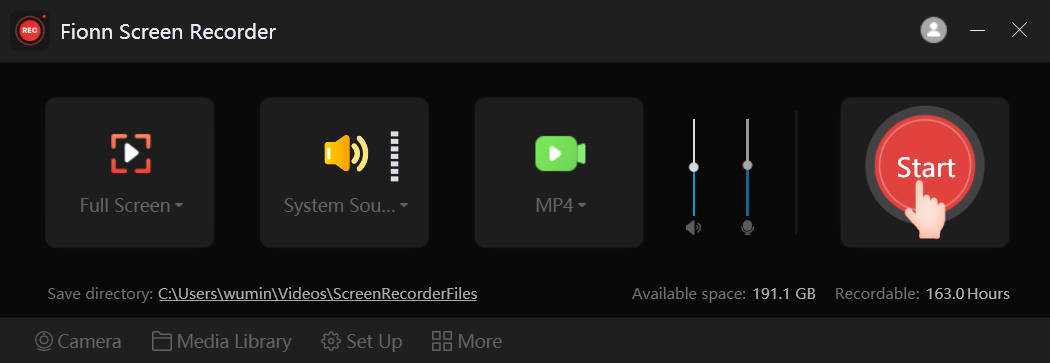
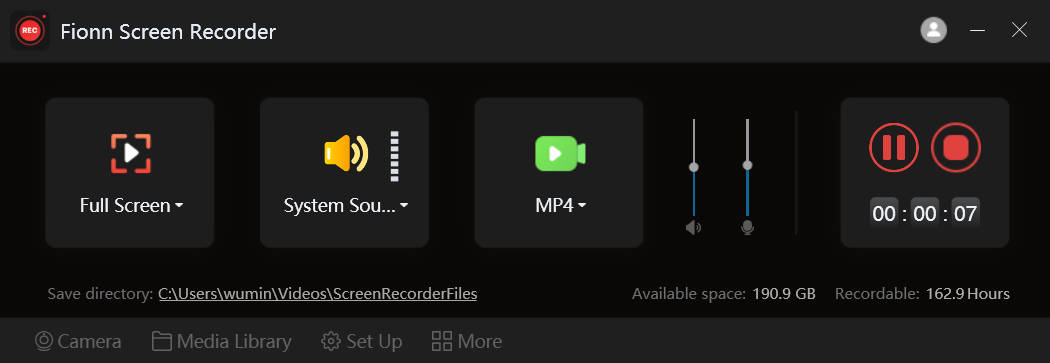
- Open Fionn Screen Recorder and choose the area you want to capture: Full Screen, Window, or Region.
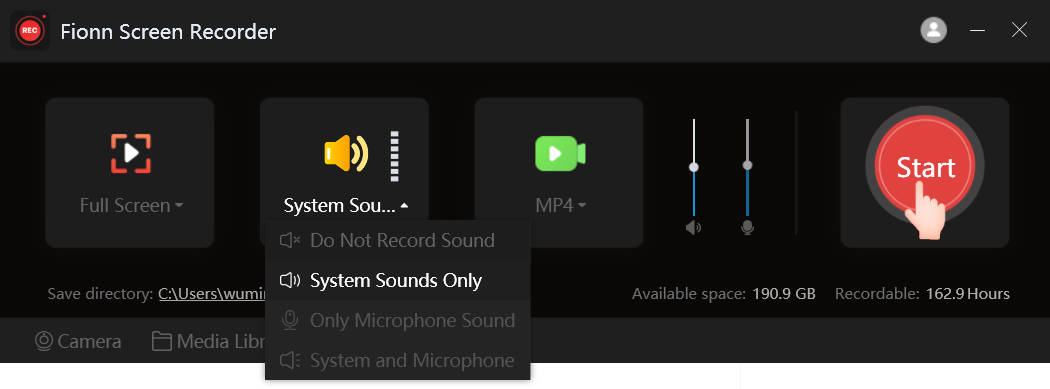
- Choose whether to record system audio, microphone audio, both, or no sound.
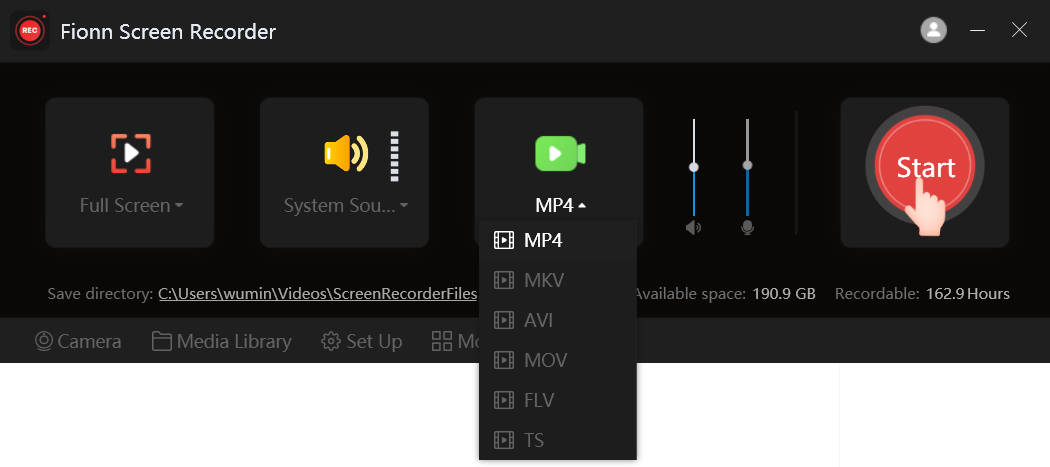
- Select MP4 or another video format before you start recording.
- Click Start to begin recording, then use Pause or Stop when you are finished.
- Open Media Library to play, edit, locate, or delete your recorded videos.
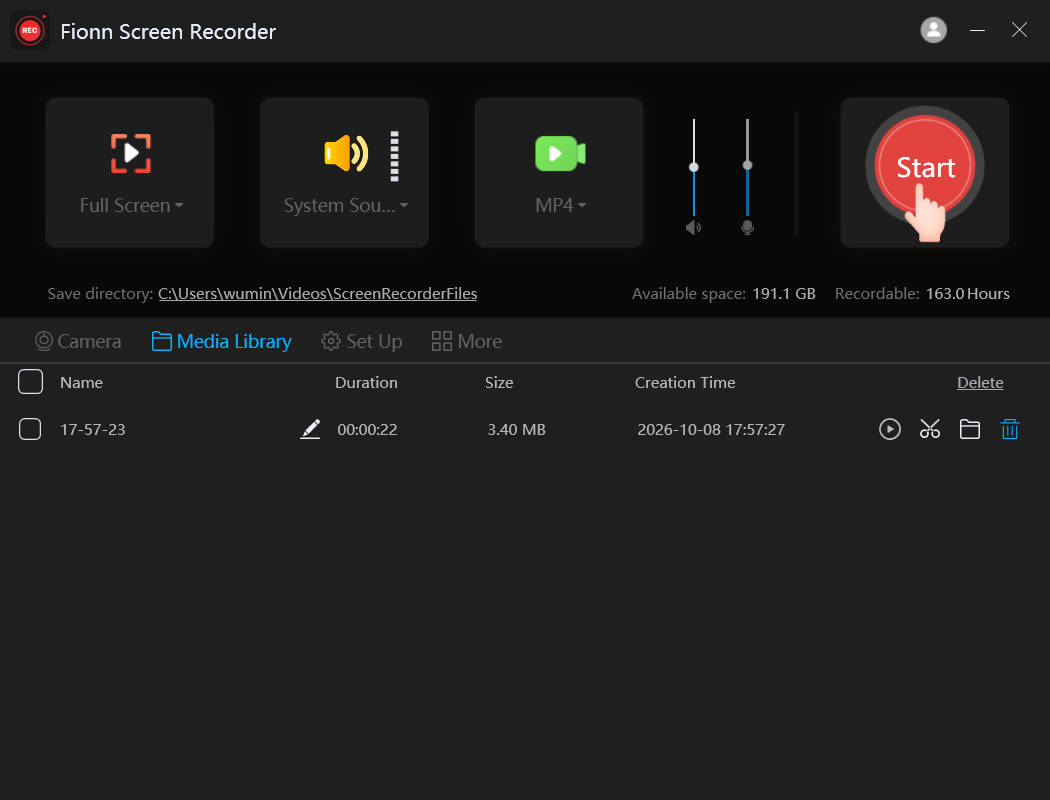
Verify: In Media Library, play the recording and check the selected capture area and audio. The product supports video and audio quality settings, plus frame rates from 1 to 60 FPS; choose settings appropriate to your intended output rather than assuming a higher setting is necessary.
Method 3: Record with OBS Studio
When to use: Choose OBS Studio when a recording needs a scene with more than one source, such as a desktop or game plus a webcam. It takes more setup than the first two options.
- Install and open OBS Studio, then run
Tools > Auto-Configuration Wizard
if you want OBS to optimize initial settings for recording.
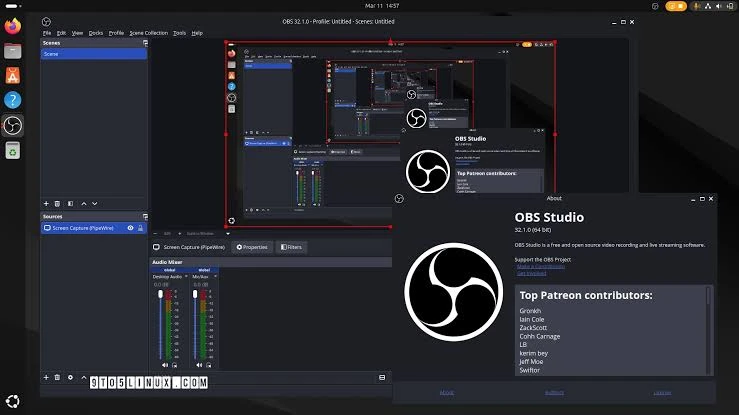
- Create or select a scene, then use the + button in Sources to add a capture source that fits your target, such as Display Capture, Window Capture, or Game Capture.
- Check the Audio Mixer meters; if the intended device is not responding, select the device in Settings > Audio .
- Review recording output settings, select Start Recording , and make a short test before recording the final clip.
Verify: Stop the test, open the resulting recording, and check that the chosen source and audio are present. The official OBS Studio Quick Start Guide documents its configuration wizard, sources, audio checks, and test-recording workflow.
Tips for a usable recording
- Close notifications and private tabs before capturing the full display.
- Decide whether the recording needs system audio, microphone audio, both, or neither before you start.
- Use window or region capture when unrelated on-screen content should stay out of the video.
- Record a short test whenever audio matters; a visible meter does not replace listening to the saved file.
Conclusion
For a quick selected-area clip on Windows 11, start with Snipping Tool. Choose Fionn Screen Recorder when you need to choose a screen, window, or region and set audio before recording. Use OBS Studio when your project needs scene-based capture or multiple sources. Whichever path you choose, verify the saved file by watching the opening and closing seconds and listening for the intended audio. If something is missing, adjust the capture scope or audio selection, then repeat a short test rather than re-recording the entire session.
FAQ
Can I record my screen without Xbox Game Bar on Windows 11?
Yes. Snipping Tool can record a selected area on Windows 11. Fionn Screen Recorder and OBS Studio provide alternative recording workflows.
Which method is fastest for a short screen clip?
Snipping Tool is usually the quickest when a selected area is all you need, because its recording controls are built into Windows 11.
How do I make sure audio was recorded?
Choose the needed audio source before recording, then play a short saved test clip. This checks the actual output rather than only the recorder’s settings.
When should I use OBS Studio instead?
Use OBS Studio when you need a scene with sources such as desktop capture, a window, gameplay, or a webcam, and are comfortable with additional setup.
Can I record only one window?
Yes. Fionn Screen Recorder supports window capture, and OBS Studio provides a Window Capture source. Select the specific target before you begin recording.


